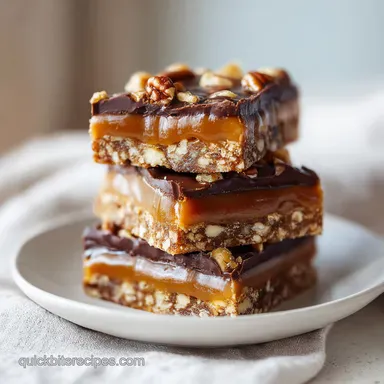
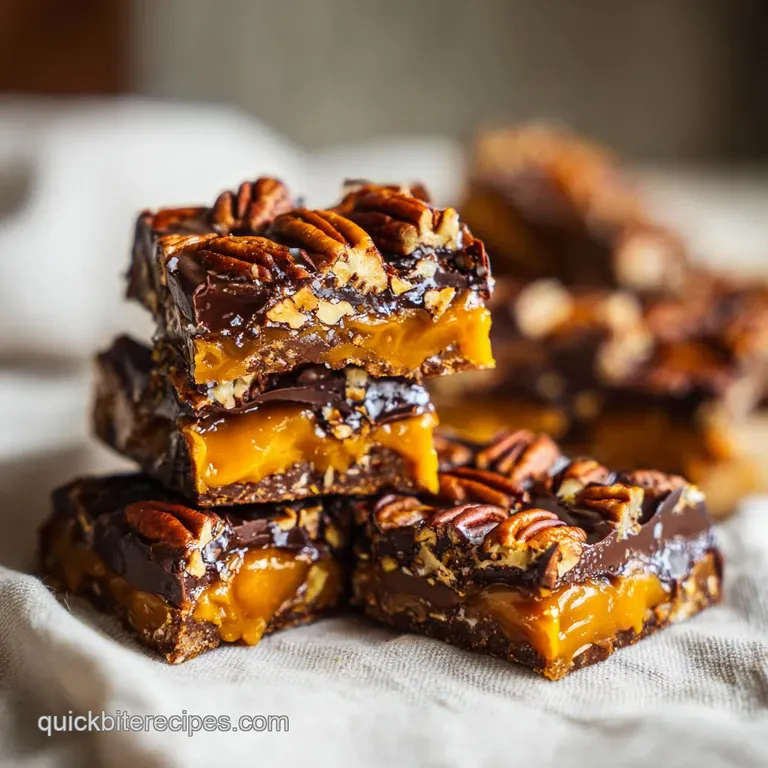
Turtle Bars: Buttery and Chewy
- Time: 30 min active + 2 hrs chilling = 3 hrs 20 mins total
- Flavor/Texture Hook: Buttery, chewy caramel with a chocolate snap
- Perfect for: Holiday dessert platters or a high effort-tasting treat that's actually simple
The smell of toasted pecans and bubbling brown sugar is basically a hug in the kitchen. I remember the first time I brought these to a neighborhood potluck years ago. I was so nervous the caramel would be too runny, but the moment I sliced into them, that deep mahogany layer just held its shape.
People weren't even talking; they were just hovering over the plate, waiting for the next piece.
You're going to love how these come together. We're layering a tender shortbread, a rich pecan caramel, and a smooth chocolate finish. These Turtle Bars aren't about fancy techniques, just good timing and patience while they chill.
Trust me, the wait for the refrigeration is the hardest part, but it's what gives you that clean, sharp edge when you cut them. Let's get into how to make these without the stress.
The Secrets to Better Turtle Bars
The magic here is in the layers. You aren't just throwing things in a pan; you're building a dessert. The goal is a base that can hold up to a heavy caramel without becoming a soggy mess, and a chocolate top that doesn't crack when you bite into it.
Sugar Saturation: The granulated sugar in the crust creates a tight crumb that resists soaking up too much moisture from the caramel.
Condensed Milk Stability: Using sweetened condensed milk prevents the caramel from crystallizing or separating, which is why you don't need a thermometer.
Temperature Control: Adding the chocolate to the hot caramel allows it to melt evenly, but the long chill ensures the fats reset for a velvety mouthfeel.
Pecan Toasting: The nuts are simmered in the caramel, which infuses the entire layer with a nutty, toasted aroma.
| Feature | Homemade Caramel | store-bought Shortcut | Impact on Result |
|---|---|---|---|
| Texture | Chewy and thick | Often too runny | Homemade holds its shape better |
| Flavor | Deep, buttery notes | Sugary and artificial | Fresh caramel tastes more complex |
| Effort | 10 mins stovetop | 0 mins | Minimal extra work for huge flavor |
The way ingredients interact determines if your bar is a treat or a puddle. I've found that using a standard all purpose flour is best here, as too much protein (like bread flour) makes the base too tough. According to the King Arthur Baking guide, the protein content in flour directly affects the tenderness of shortbread.
Component Analysis
| Ingredient | Science Role | Pro Secret |
|---|---|---|
| Sweetened Condensed Milk | Provides body and sweetness | Stir constantly to avoid scorched bottoms |
| Unsalted Butter | Creates the flaky shortbread texture | Use melted butter for a denser, more stable base |
| Brown Sugar | Adds molasses flavor and moisture | Pack it tight for a more consistent caramel |
| Semisweet Chocolate | Sets the top layer | Use high-quality chips for a cleaner snap |
Gathering Your Essentials
Right then, let's look at what you need. I've listed the exact amounts from my tried and true method. Don't be tempted to cut the butter; that's where the soul of the recipe lives.
- ½ cup (115g) unsalted butter, melted Why this? Provides the rich, savory base for the crust
- ⅓ cup (65g) granulated sugar Why this? Keeps the crust crisp and sweet
- 1 cup (125g) all purpose flour Why this? Standard structure for shortbread
- ¼ tsp (1.5g) salt Why this? Balances the heavy sugar levels
- 1 can (14 oz / 397g) sweetened condensed milk Why this? The secret to a stable, velvety caramel
- ½ cup (115g) unsalted butter Why this? Emulsifies with the sugar for the topping
- ½ cup (100g) packed brown sugar Why this? Gives that classic "turtle" molasses taste
- 1 cup (115g) chopped pecans Why this? Essential crunch and earthy flavor
- 1 ½ cups (255g) semisweet chocolate chips Why this? Provides a bitter contrast to the sweet caramel
- 2 tbsp (28g) unsalted butter Why this? Makes the chocolate topping glossy and smooth
| Original Ingredient | Substitute | Why It Works |
|---|---|---|
| Pecans (1 cup) | Walnuts (1 cup) | Similar crunch. Note: Slightly more bitter, less "buttery" than pecans |
| Semisweet Chips | Dark Chocolate (60%+) | More intense cocoa. Note: Reduces overall sweetness |
| All purpose Flour | gluten-free 1:1 Blend | Similar structure. Note: May result in a slightly more crumbly base |
Necessary Kitchen Tools
You don't need a professional kitchen for this, but a few things make it easier. A 9x9 inch baking pan is non negotiable here; if you use a larger pan, your layers will be too thin and the caramel might overcook.
I always use parchment paper with an overhang. Trust me on this, trying to lift these bars out of a greased pan is a recipe for heartbreak. You'll want that "sling" to lift the whole block out once it's chilled.
A heavy bottomed saucepan is also key for the caramel. Thin pans have hot spots that can burn the condensed milk in seconds. If you have a silicone spatula, use it to scrape every single bit of that caramel out of the pot.
The Baking Process
Let's crack on. This is a three phase process: the base, the caramel, and the chocolate.
Phase 1: Pressing the Shortbread Base
- Preheat your oven to 350°F (175°C). Line your 9x9 inch pan with parchment paper, leaving an overhang on the sides.
- Mix the melted butter, granulated sugar, flour, and salt. Stir until a soft, cohesive dough forms. Note: Don't overmix or the crust will be tough
- Press the dough firmly into the bottom of the pan. Bake for 15-18 minutes until the edges are pale gold.
Phase 2: Simmering and Baking the Caramel
- Place a saucepan over medium heat. Melt the ½ cup butter and brown sugar together, then stir in the sweetened condensed milk.
- Simmer the mixture for 2-3 minutes until it looks smooth and glossy, then fold in the chopped pecans.
- Pour this mixture over the hot crust and spread it evenly with a spatula.
- Bake for 20-25 minutes until the caramel is bubbling and has a deep mahogany color.
Phase 3: Layering the Chocolate and Setting
- While the bars are still hot from the oven, sprinkle the semisweet chocolate chips evenly across the top.
- Let the chips sit for 5 minutes to soften. Use a spatula to spread them into a velvety, smooth layer. Note: Adding the 2 tbsp butter here helps the chocolate spread easier
- Cool to room temperature, then refrigerate for at least 2 hours before slicing your Turtle Bars into 12 squares.
Common Pitfalls

But what about the sogginess? Or the chocolate that doesn't melt? I've been there. The most common issue is rushing the cooling process. If you cut these while they're warm, the caramel will ooze out and you'll have a sticky mess instead of clean bars.
Why Your Caramel is Runny
If your caramel doesn't set, it's usually because it didn't reach the bubbling stage in the oven. The second bake is what thickens the condensed milk mixture. If it looks like sauce, pop it back in for 5 more minutes.
Why Your Base Cracked
A cracked base usually happens if the dough was pressed too thinly in some areas and too thick in others. Make sure you use the back of a spoon or a flat glass to get an even layer across the whole pan.
| Problem | Root Cause | Solution |
|---|---|---|
| Chocolate won't spread | Not enough residual heat | Use a hair dryer for 30 seconds or melt butter into chips |
| Base is too hard | Overbaked the crust | Stick strictly to the 15-18 minute window |
| Caramel tastes burnt | Heat too high during simmer | Keep the saucepan on medium and stir constantly |
Mistakes Checklist:
- ✓ Did I use parchment paper with an overhang?
- ✓ Did I simmer the caramel until glossy before pouring?
- ✓ Did I wait for the chocolate to soften before spreading?
- ✓ Did I refrigerate for a full 2 hours?
- ✓ Did I press the crust evenly into the corners?
Customizing Your Bars
If you want a different vibe, you can easily tweak these. For a salty sweet twist, sprinkle a pinch of flaky sea salt over the caramel right before you add the chocolate. It cuts through the richness beautifully.
For a darker profile, swap the semisweet chips for 70% dark chocolate. This works particularly well if you're serving these with coffee. If you're making these for someone who doesn't like pecans, walnuts or hazelnuts are great swaps.
If you're aiming for a gluten-free version, a 1:1 GF flour blend works well. You might find the base is a bit more fragile, so let them chill for an extra hour to ensure they hold together.
| Batch Size | Pan Change | Time Adjustment | Note |
|---|---|---|---|
| Half (½) | 8x8 inch | Reduce bake by 2-3 mins | Use 1 egg if adding binders |
| Double (2x) | Two 9x9 pans | Same time | Work in batches for caramel |
Truths About Caramel
You might hear that you need a candy thermometer to get a professional set. Honestly, don't even bother with one for this recipe. The condensed milk does the heavy lifting for you, ensuring a consistent thickness every time.
Some say you should toast the pecans in the oven first. While that adds a bit more depth, simmering them in the butter and sugar is enough to bring out their oils. It saves a step and keeps the kitchen cleaner.
Storage and Leftover Tips
These keep surprisingly well. Store them in an airtight container in the fridge for up to 7 days. I actually prefer them cold the chocolate has a better snap and the caramel is more chewy.
For long term storage, you can freeze these for up to 3 months. Just wrap the whole block in foil and then plastic wrap. To thaw, let them sit in the fridge overnight.
To avoid waste, if you have a bit of caramel left in the pot, don't wash it out! Stir in a splash of cream and use it as a dip for apple slices.
What to Serve With
Because these are so rich, you want something to cut through the fat. A bold espresso or a dark roast coffee is the gold standard here. The bitterness of the coffee balances the sweet caramel.
If you're serving these at a party, a cold glass of whole milk is a classic for a reason. For something a bit more "grown up," a glass of Tawny Port or a spicy bourbon complements the nutty pecans and chocolate.
When you're plating them, I like to serve a single bar with a few fresh raspberries on the side. The tartness of the berries refreshes the palate between bites of those decadent Turtle Bars.
Recipe FAQs
Can I store these bars at room temperature?
No, keep them refrigerated. Store them in an airtight container in the fridge for up to 7 days to maintain the chocolate's snap and the caramel's chewiness.
How to achieve a perfectly smooth chocolate topping?
Sprinkle semisweet chocolate chips over the bars while they are hot from the oven. Let them sit for 5 minutes to soften, then use a spatula to spread them into an even layer.
Why are my turtle bars too gooey to slice cleanly?
You likely didn't chill them long enough. Allow the bars to reach room temperature, then refrigerate for at least 2 hours to ensure the caramel sets completely.
Is it true I should let the caramel cool before adding the chocolate?
No, this is a common misconception. The bars must be hot from the oven so the chocolate chips melt enough to be spread smoothly.
How to prevent the shortbread crust from over browning?
Bake the crust for only 15 18 minutes at 350°F. Remove the pan from the oven as soon as the edges are pale gold.
Can I use a larger baking pan for this recipe?
No, use a 9x9 inch pan. A larger pan will result in thinner layers and will alter the required bake times for the crust and caramel.
How to freeze these bars for long term storage?
Wrap the whole block in foil and then plastic wrap. They can be frozen for up to 3 months; thaw them in the fridge overnight before slicing.
Easy Pecan Turtle Bars