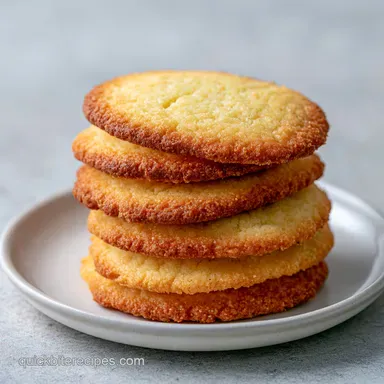
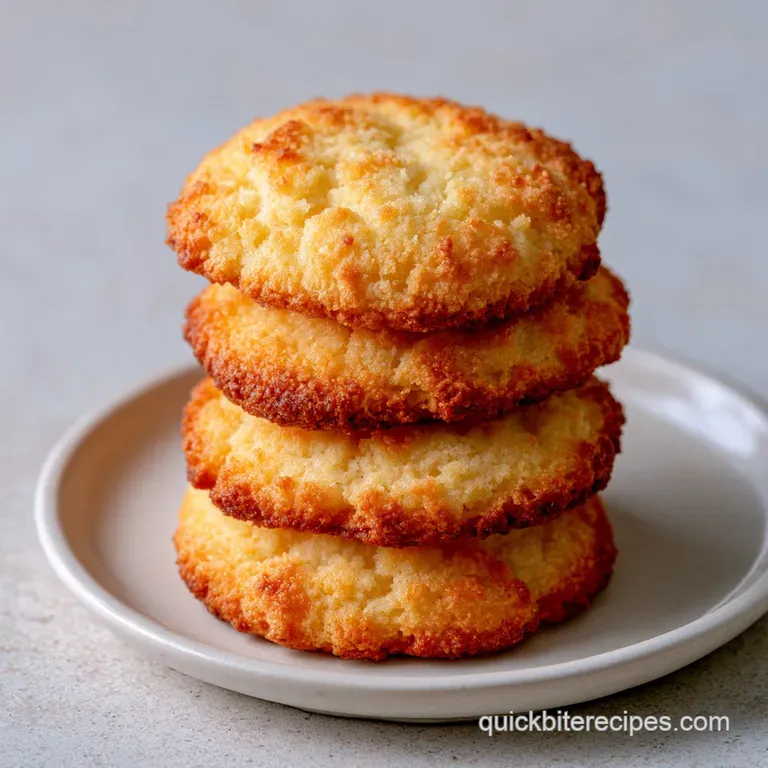
Condensed Milk Cookies: Chewy and Golden
- Time:10 minutes active + 30 minutes chilling = Total 52 minutes
- Flavor/Texture Hook: Velvety soft centers with a light mahogany brown snap
- Perfect for: Last minute school treats or budget-friendly dessert cravings
- Easy Homemade Condensed Milk Cookies
- The Secret To Better Texture
- Component Analysis
- Pantry Staples You Need
- The Right Kitchen Tools
- The Step By Step Process
- Fixing Common Baking Issues
- Troubleshooting Common Issues
- Customizing Your Batch
- Adjusting Your Batch Size
- Debunking Baking Myths
- Keeping Cookies Fresh
- Perfect Treats To Pair
- Recipe FAQs
- 📝 Recipe Card
That smell of toasted sugar and warm vanilla hitting the air the second you open the oven door is honestly the best part of my afternoon. I remember making these on a rainy Tuesday when the kids wanted something "fancy" but I had exactly zero energy to whip up a complex batter.
I just grabbed a can of condensed milk and some butter, and within an hour, the whole house smelled like a professional bakery.
The real magic here is how the dough feels. It's not like those grainy, sugar heavy batters you're used to. It's smooth, almost like a thick frosting, and it transforms into these chewy little clouds that melt in your mouth.
These Condensed Milk Cookies aren't trying to be a gourmet pastry, they're just pure, unadulterated comfort.
You can expect a cookie that holds its shape well but stays tender. We're going for a specific look here: edges that have a slight shatter to them while the middle remains soft and pillowy.
It's the kind of recipe that makes you feel like a pro even if you're just wearing an old t shirt and mismatched socks in the kitchen.
Easy Homemade Condensed Milk Cookies
The secret to this recipe is the way the sweetened condensed milk acts as both the sweetener and the liquid. Since the milk is already reduced and concentrated, it gives the cookies a deep, caramelized flavor that you just can't get with regular milk and sugar.
It's a budget friendly way to get a high end taste without spending a fortune on specialty ingredients.
I've found that the most common mistake is skipping the chill time. I know, I know, you want them now. But that 30 minute nap in the fridge is what stops them from turning into one giant pancake on your baking sheet.
When the butter firms up again, the cookies keep their plump shape and get that lovely contrast between the crisp outside and the soft inside.
If you're in the mood for something even more indulgent, you might like my Bars with Condensed Milk recipe, which use a similar base but add a layer of gooey caramel and pecans. But for a simple, everyday treat, these cookies are the gold standard. They're just sweet enough to satisfy a craving without being overwhelming.
The Secret To Better Texture
Instead of a textbook, let's just talk about why this actually works in your bowl. It's all about how the ingredients interact when they hit the heat.
- Sugar Concentration: The condensed milk has a huge amount of dissolved sugar, which creates a denser, more chewy structure than granulated sugar.
- Fat Distribution: Softened butter blends into the milk to create a velvety emulsion, ensuring the cookies don't feel greasy.
- Leavening Lift: The baking soda reacts with the slight acidity in the milk, giving the cookies just enough lift to be light.
- Temperature Control: Chilling the dough slows down the butter's melt rate in the oven, which prevents excessive spreading.
| Method | Prep Time | Texture | Best For |
|---|---|---|---|
| This Recipe | 10 minutes | Chewy & Velvety | Quick cravings / Budget |
| Classic Creaming | 20 minutes | Airy & Crisp | Traditional tea cookies |
| No Bake Style | 5 minutes | Fudgy & Dense | No oven days |
Component Analysis
I like to think of every ingredient as having a "job" to do. When you know the job, you know why you can't just swap things out randomly.
| Ingredient | Science Role | Pro Secret |
|---|---|---|
| Condensed Milk | Sweetener & Binder | Use full fat for the most velvet like crumb |
| Unsalted Butter | Texture & Flavor | Keep it "cool room temp" so it doesn't oil out |
| Baking Soda | Lift | Sift it to avoid those bitter green spots |
| All Purpose Flour | Structure | Measure by weight if you have a scale |
Pantry Staples You Need
Here is exactly what you'll need to get these on the table. I've kept it simple because that's the whole point of 3 ingredient dessert recipes, even though we've added a few basics for better flavor.
- 1/2 cup (115g) unsalted butter, softened Why this? Provides the rich, melt in-your mouth base (Substitute: salted butter, but omit the extra salt)
- 1 can (14 oz / 397g) sweetened condensed milk Why this? The primary sweetener and moisture source (Substitute: evaporated milk + 3/4 cup sugar, though texture will change)
- 2 1/2 cups (310g) all purpose flour Why this? Gives the cookie its necessary structure (Substitute: gluten-free 1:1 blend)
- 1/2 tsp (3g) baking soda Why this? Helps the cookies rise and brown (Substitute: 1 1/2 tsp baking powder)
- 1/4 tsp (1.5g) salt Why this? Balances the heavy sweetness of the milk (Substitute: fine sea salt)
- 1 tsp (5ml) vanilla extract Why this? Adds depth and aroma (Substitute: almond extract for a nutty vibe)
The Right Kitchen Tools
You don't need a fancy studio to make these. A couple of basic tools will do the trick. I usually use a large mixing bowl and a sturdy spatula. If you have a stand mixer such as KitchenAid, you can use the paddle attachment, but honestly, a hand mixer or even a wooden spoon works just fine here.
Make sure you have parchment paper or silicone mats. These cookies have a high sugar content, meaning they love to stick to bare metal pans. I've had a few batches where half the cookie stayed on the pan, and trust me, it's not a fun way to start your morning.
The step by step Process
Let's get into it. Just follow these steps, and you'll have a batch of the best condensed milk cookies recipe results in no time.
Phase 1: Creating the Base
- In a large bowl, cream together the softened butter and sweetened condensed milk. Note: Make sure the butter is soft but not melted, or the dough will be too oily.
- Stir in the vanilla extract until the mixture is smooth and glossy.
Phase 2: Incorporating Dry Ingredients
- Sift in the flour, baking soda, and salt. Note: Sifting prevents clumps of baking soda from ruining the taste.
- Fold the ingredients together with a spatula until no more streaks of white flour remain. Stop mixing as soon as it's combined to keep the cookies tender.
Phase 3: The Essential Chill
- Cover the dough with plastic wrap.
- Place it in the refrigerator to chill for 30 minutes. Note: This is the non negotiable step for a thick cookie.
Phase 4: Shaping and Baking
- Preheat the oven to 350°F (175°C).
- Scoop rounded tablespoons of dough and place them 2 inches apart on parchment lined baking sheets.
- Bake for 10–12 minutes until the edges are light mahogany brown but the centers remain soft.
Chef's Note: To get that professional look, gently press a few chocolate chips or a pinch of flaky salt on top of the dough balls right before they go into the oven.
Fixing Common Baking Issues

Even for experienced cooks, things can go sideways. Usually, it's just a matter of temperature or measurement. If your cookies aren't coming out right, don't toss the whole batch.
Troubleshooting Common Issues
| Issue | Solution |
|---|---|
| Why Your Cookies Spread Too Much | If your cookies are merging into one giant sheet, the butter was likely too warm when you started, or you skipped the chilling phase. The fat melts faster than the structure can set. |
| Why Your Cookies Are Too Cakey | This usually happens if you over mix the dough after adding the flour. When you stir too much, you develop too much gluten, which turns a chewy cookie into a small cake. |
| Why Your Cookies Are Pale | Your oven might be running a bit cool, or you pulled them out too early. Remember, they keep cooking for a few minutes on the hot pan after you take them out. |
Common Mistakes Checklist
- ✓ Did you measure the flour by spooning it into the cup (not scooping)?
- ✓ Is your butter soft (indentation stays) but not greasy?
- ✓ Did you let the dough chill for the full 30 minutes?
- ✓ Are the cookies spaced at least 2 inches apart?
- ✓ Did you remove them while the center still looks slightly underbaked?
Customizing Your Batch
One of the reasons I love these simple condensed milk cookies is that they are basically a blank canvas. You can change the flavor profile entirely just by adding a few mix ins.
For Condensed Milk Cookies Chocolate Chip
Add 1 cup of semi sweet chocolate chips to the dough during the final fold. The richness of the condensed milk makes the chocolate taste even deeper. It's like a cross between a traditional chip cookie and a fudge brownie.
For a Nutty Crunch
Fold in 1/2 cup of toasted walnuts or pecans. If you love the vibe of my Caramel Ritz Cookies, try adding a pinch of cinnamon to the flour mixture for a warmer, spiced flavor.
To Make it gluten-free
Swap the all purpose flour for a high-quality 1:1 gluten-free blend. I recommend one that contains xanthan gum. You might find the dough is slightly stickier, so give it an extra 10 minutes in the fridge.
For a Zesty Citrus Twist
Add the zest of one lemon or orange to the butter mixture. The acidity of the citrus cuts through the heavy sweetness of the milk, creating a bright, refreshing treat.
Adjusting Your Batch Size
Sometimes you only want a few cookies, and other times you're feeding a crowd. Here is how to handle the numbers.
Scaling Down (Half Batch): Use 1/4 cup butter and half a can of condensed milk. For the egg free nature of this recipe, it's easy, but you'll need to use 1 1/4 cups of flour.
Reduce your bake time by about 1-2 minutes since the smaller mass of dough in the oven can sometimes cook faster.
Scaling Up (Double Batch): When doubling, don't just double the baking soda and salt exactly - use 1.5x the amount first and taste a tiny bit of the dough. Increase the flour and milk as usual.
I highly suggest working in batches rather than one giant bowl; it's much easier to ensure the flour is fully incorporated without over mixing.
| Goal | Change | Impact |
|---|---|---|
| Thicker Cookies | +1/4 cup flour | Denser, less spread |
| Chewier Cookies | -2 tbsp flour | More "oozy" center |
| Crispier Edges | +2 mins bake time | More caramelization |
Debunking Baking Myths
There's a lot of noise out there about baking, but let's set the record straight for this specific recipe.
Myth: You must use a stand mixer for cookies. Actually, for condensed milk cookies, a hand mix is often better. You don't need to incorporate air (like you do with creamed sugar), so a spatula is all you need to avoid over working the gluten.
Myth: Room temperature butter is "soft" butter. Not always. "Room temperature" depends on your house. For this recipe, the butter should be pliable but still hold its shape. If it's glistening or melting, it's too warm and will cause the cookies to spread.
Keeping Cookies Fresh
Since these cookies have a high sugar and fat content, they stay moist much longer than a standard sugar cookie. But you still want to store them right to keep that velvety texture.
Storage Guidelines: Keep them in an airtight container at room temperature for up to 5 days. I like to put a piece of parchment paper between layers so they don't stick together. In the fridge, they'll last about 2 weeks, though they become much denser and more fudge like.
Freezing and Reheating: You can freeze the baked cookies for up to 3 months. Just wrap them tightly in foil. To bring them back to life, pop them in a 300°F (150°C) oven for 3-5 minutes. This restores the crisp edges while keeping the center soft.
You can also freeze the raw dough balls! Just bake them straight from the freezer, adding 2 minutes to the cook time.
Zero Waste Tips: If you have a little bit of condensed milk left in the can, don't throw it away. Stir it into your morning coffee as a creamy sweetener, or drizzle it over some sliced bananas.
If you have leftover butter wrappers, use them to grease your mixing bowl for the next batch - it's a small thing, but it helps!
Perfect Treats To Pair
These cookies are quite rich, so I usually pair them with something that has a bit of a contrast. A cold glass of unsweetened almond milk or a strong, black coffee is the classic choice. The bitterness of the coffee balances the sweetness of the condensed milk perfectly.
If you're serving these as part of a dessert spread, try pairing them with some fresh berries. The tartness of raspberries or blueberries cuts through the richness. For another creamy companion, a side of Sago with Coconut Milk recipe makes for a tropical themed treat platter that's sure to impress.
Whether you're making these for a party or just a midnight snack, remember that the beauty is in the simplicity. You don't need a million ingredients to make something that tastes like a hug from your grandmother. Just keep your butter cool, your flour sifted, and your patience high during that 30 minute chill.
Enjoy your homemade Condensed Milk Cookies!
Recipe FAQs
What does condensed milk do to the texture of these cookies?
It creates a chewy, fudge like consistency. The high concentration of sugar and milk solids prevents the cookies from becoming too crisp or dry.
Why did my cookies spread and merge on the baking sheet?
Your butter was likely too warm or you skipped the chilling step. When the fat is too soft, it melts faster than the dough structure can set in the oven.
Why are my cookies cakey instead of chewy?
You likely overmixed the batter after adding the flour. Excessive stirring develops too much gluten, which turns a chewy cookie into a cake like texture.
Is it true that I can skip the 30-minute chilling phase?
No, this is a common misconception. Chilling the dough is essential to stabilize the butter and ensure the cookies maintain their rounded shape.
How to ensure the cookies get a mahogany brown edge?
Bake at 350°F for 10 12 minutes. If they remain pale, check that your oven is fully preheated and avoid overcrowding the parchment lined sheets.
How to mix the dough without overworking it?
Fold the dry ingredients in with a spatula. Stop stirring as soon as the last streaks of white flour disappear. If you enjoyed mastering this folding technique here, see how the same principle works in our peanut butter cookies.
Can I use a different type of flour?
No, stick with all-purpose flour. This specific ratio of condensed milk and butter requires the protein structure of all-purpose flour to hold together properly.
Condensed Milk Cookies