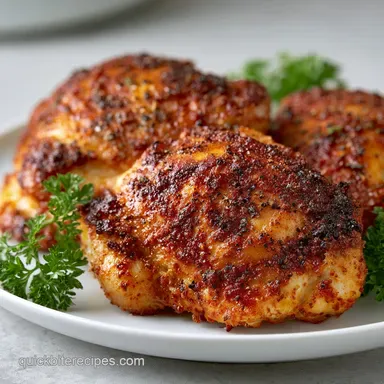
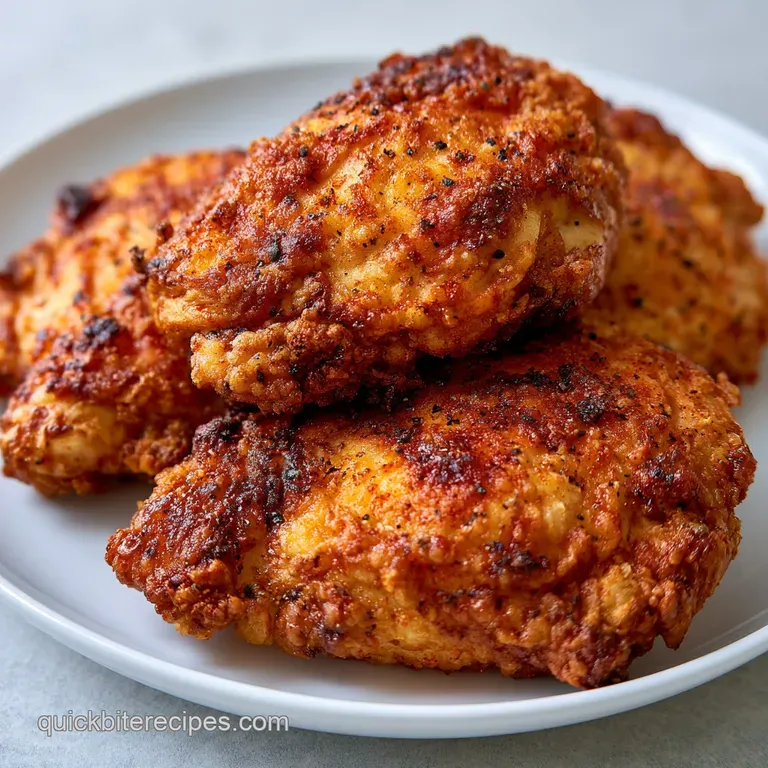
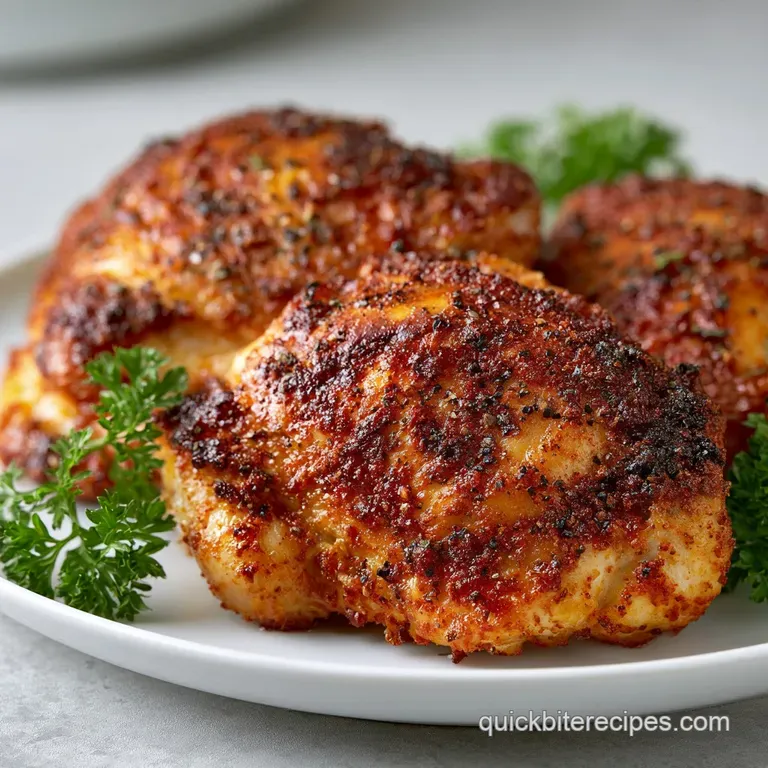
Easy Baked Chicken Thighs: Crispy and Golden
- Time: 5 min active + 45 min baking = 50 mins total
- Flavor/Texture Hook: Smoky, salty rub with a crackling, golden brown skin
- Perfect for: Budget-friendly weeknight dinners or low carb meal prep
That sound of the skin crackling as you lift the tray out of the oven is basically music to me. There is nothing quite like the aroma of smoked paprika and garlic hitting the hot air, filling the whole kitchen with that "Sunday dinner" vibe, even if it is just a Tuesday night.
Most people think you have to sear chicken in a heavy pan first to get a decent crust. Honestly, forget everything you know about that. It is a total waste of time and creates a greasy mess on your stove. You can get that same crunch right in the oven if you stop treating your chicken like a sponge.
This Easy Baked Chicken Thighs method is all about moisture control and airflow. I used to just toss them on a baking sheet and wonder why the bottoms were soggy. Once I switched to a wire rack, everything changed. Here is how to get it right every single time.
Secrets for Easy Baked Chicken Thighs
If you want that skin to actually shatter when you bite into it, you have to respect the physics of the oven. Most home cooks skip the drying phase, but that is where the magic happens.
Surface Dryness: Water is the enemy of crispiness. When moisture stays on the skin, the oven spends the first 20 minutes evaporating that water instead of frying the fat. By patting it bone dry, the heat hits the fat immediately.
Air Circulation: Using a rack prevents the chicken from sitting in its own juices. According to Serious Eats, allowing air to circulate around the entire piece of meat ensures the bottom doesn't steam, which is how you avoid that rubbery texture.
High Heat: We use 400°F because it is the sweet spot. It is hot enough to render the subcutaneous fat quickly, which essentially fries the skin from the inside out, but not so hot that the outside burns before the bone in meat is cooked.
Thigh Resilience: I always suggest thighs over breasts. Thighs have more connective tissue and fat, meaning they can handle the heat without turning into cardboard. They stay juicy even if you leave them in for an extra five minutes.
| Feature | Fresh Thighs | Pre Marinated/Frozen | Impact |
|---|---|---|---|
| Skin Texture | Shatter crisp | Often rubbery | Fresh allows better drying |
| Flavor Control | Total | High Sodium/Sugar | Fresh avoids burnt sugar |
| Prep Time | 5 mins | 2 mins | Negligible difference |
| Cost | Budget friendly | Markup for "convenience" | Fresh is cheaper per lb |
Component Analysis
The rub is simple, but each part does a specific job. We aren't just adding flavor, we are managing how the skin reacts to the heat.
| Ingredient | Science Role | Pro Secret |
|---|---|---|
| Olive Oil | Heat Conductor | Use just enough to bind spices without soaking the skin |
| Sea Salt | Moisture Draw | Draws out deep moisture to help the skin crisp |
| Smoked Paprika | Color/Depth | Gives that "grilled" look without using a grill |
| Garlic Powder | Flavor Base | Use powder, not fresh garlic, to avoid burnt bits |
Gathering Your Essentials
Stick to the basics here. You don't need an expensive spice rack to make this work, just a few pantry staples that play well together.
- 3 lbs bone in, skin on chicken thighs Why this? More flavor and harder to overcook than breasts
- 1 tbsp extra virgin olive oil Why this? Helps the spices adhere and conducts heat
- 1 tsp fine sea salt Why this? Penetrates the meat for deeper seasoning
- ½ tsp cracked black pepper Why this? Adds a subtle bite to balance the fat
- 1 tsp garlic powder Why this? Even coverage without burning like fresh garlic
- 1 tsp smoked paprika Why this? Adds a wood fired aroma and deep red color
- ½ tsp dried oregano Why this? Adds a slight herbal brightness
If you are looking for a twist, you can swap the oregano for dried thyme. If you are trying to cut costs, any neutral oil like canola works, though you lose that tiny bit of olive oil fragrance.
For those wanting Boneless Skinless Baked Chicken Thighs, just be aware that you'll need to reduce the cooking time by about 10-15 minutes since there is no bone to slow down the heat.
Essential Gear
You don't need a professional kitchen, but two things are non negotiable for the texture.
- Rimmed Baking Sheet: This catches all the rendered fat so it doesn't ignite in your oven.
- Wire Cooling Rack: This is the secret. It elevates the meat so heat hits the bottom.
- Instant Read Thermometer: Don't guess. Thighs are best when they hit a higher temp than breasts.
- Paper Towels: You will use more than you think.
Step-by-step Instructions
Right then, let's crack on with the actual cooking. Follow these steps exactly, and you'll see why the "dryness" part is so important.
Preheat your oven to 400°F (200°C). Line a large rimmed baking sheet with foil for easy cleanup, then set your wire cooling rack right on top. Note: The foil prevents the pan from becoming a scrubbing nightmare.
Grab your paper towels and pat every single inch of the chicken thighs bone dry. Get under the skin if you can. Do this until the towels come away clean.
Lightly coat each thigh with olive oil. You want a thin sheen, not a puddle. Note: Too much oil can actually steam the skin instead of crisping it.
In a small bowl, mix your sea salt, black pepper, garlic powder, smoked paprika, and dried oregano.
Sprinkle the seasoning mixture generously on both sides of the chicken. Press the spices firmly into the skin to make sure they don't just slide off during baking.
Place the thighs skin side up on the wire rack. Ensure there is at least one inch of space between each piece. Note: Crowding the pan creates steam, which kills the crunch.
Bake for 40–45 minutes. You are looking for the skin to be deep golden brown and crackling.
Use your thermometer to check the thickest part of the thigh. Pull them out when they hit 175°F (80°C). Note: According to USDA FoodData, while 165°F is safe, thighs taste better and have a better texture at 175°F because the collagen breaks down.
What Can Go Wrong
Even the best of us mess up. Usually, it comes down to moisture or temperature.
Troubleshooting Common Issues
| Issue | Solution |
|---|---|
| Why Your Skin is Rubbery | This almost always happens because the chicken was still damp when it went into the oven. If you didn't pat it dry or if you used too much oil, the skin steams. It'll be cooked, but it won't have that |
| Why the Meat feels Dry | It's rare with thighs, but if you use a thermometer that isn't calibrated or if your oven runs hot, you can overcook them. However, most "dry" thighs are actually just undercooked, meaning the connect |
| Why the Spices Burnt | If you add sugar or honey to your rub, they will burn at 400°F. Stick to the dry spices listed here. If you really want a glaze, brush it on during the last 5 minutes of cooking. |
Common Mistakes Checklist:
- ✓ Patting the skin completely dry with paper towels
- ✓ Leaving space between thighs on the rack
- ✓ Using a wire rack instead of the flat pan
- ✓ Checking the internal temp with a meat thermometer
- ✓ Pressing the rub into the skin firmly
Adjusting for Size
Whether you are cooking for one or a crowd, the rules change slightly.
Scaling Down (1-2 servings): If you are only doing 2 thighs, use a smaller toaster oven tray if you have one. Reduce the baking time by about 5-10 minutes, as a smaller mass of meat heats up faster.
Use a small bowl to mix your spices, but still keep that one inch gap between the pieces.
Scaling Up (Family size): When doing 6-8 lbs of chicken, do not try to jam them all on one tray. Work in batches or use two racks. Increase your salt and spices to about 1.5x the original amount, but don't go full 2x or it can become overly salty.
If you use two racks in the oven, rotate the trays halfway through the 45 minutes to ensure even browning.
Baking Variation: If you find your oven has a "hot spot" that burns the edges, lower the temp to 375°F and extend the time by 10 minutes. This is a safer bet for very large batches.
| Goal | Action | Result |
|---|---|---|
| Extra Crispy | Add 2 mins under broiler | Charred, bubbly skin |
| Leaner Meal | Remove skin after cooking | Lower fat, keep the juice |
| Faster Cook | Use boneless thighs | Saves 10-15 mins |
Truths About Baking Chicken
There are a few things people tell you about chicken that just aren't true. Let's set them straight.
The "Searing" Myth: Many claim you must sear meat to "seal in the juices." This is a lie. Moisture loss happens regardless of how you start. The sear is for flavor and color, not for moisture. With Easy Baked Chicken Thighs, the high oven heat does the same job without the pan splatter.
The Room Temp Debate: You'll hear that meat must sit out for 30 minutes to cook evenly. While this helps slightly with high end steaks, for bone in thighs, it's not a dealbreaker. The difference in final cook time is negligible. Just get them in the oven.
Storage Guidelines
Don't let your leftovers go to waste. These thighs actually hold up better than breasts when reheated.
Fridge Storage: Store in an airtight container for 3-4 days. To get the skin crispy again, don't use the microwave. Pop them in an air fryer or a 350°F oven for 5-8 minutes.
Freezing: You can freeze cooked thighs for up to 3 months. Wrap them tightly in foil and then a freezer bag to prevent freezer burn. Thaw in the fridge overnight before reheating.
Zero Waste: Don't throw away those bones! Once you've eaten the meat, toss the bones into a pot with water, a carrot, and some celery. Simmer for a few hours to make a rich, homemade chicken stock.
If you have leftover skin bits on the foil, you can actually render them down in a small pan to make a quick schmaltz (chicken fat) for roasting potatoes.
Pairing Ideas
Since these have a smoky, savory profile, you want sides that can either cut through the richness or lean into the comfort.
The Comfort Classic: I love serving these with Kopytka with Mushroom Sauce. The creamy, earthy mushrooms pair beautifully with the smoked paprika on the chicken.
The Low Carb Power Bowl: Serve the chicken over a bed of sautéed spinach and roasted cauliflower. The rendered chicken fat from the pan can actually be used to sauté the veggies for extra flavor.
The Party Platter: If you are serving these as part of a spread, put a big bowl of Homemade Hummus in the center with some sliced cucumbers and warm pita. The coolness of the hummus balances the heat of the oven baked chicken.
The Quick Side: A simple arugula salad with lemon vinaigrette is the best way to cut through the fat of the thighs and refresh your palate between bites.
Recipe FAQs
Is it better to bake chicken thighs at 400 or 425?
Stick with 400°F (200°C). This temperature ensures the meat reaches 175°F without burning the spice rub or drying out the skin.
How to bake chicken thighs in the oven?
Pat the skin bone dry, season generously, and bake on a wire rack at 400°F. Cook for 40 45 minutes until an instant read thermometer hits 175°F.
How to cook boneless and skinless chicken thighs in an oven?
Lower the baking time to 20 30 minutes at 400°F. Without the bone and skin to protect the meat, these pieces cook significantly faster.
How to cook chicken thighs in a pan?
Sear skin side down over medium high heat until crisp, then flip and lower the heat. Cover the pan and cook until the internal temperature reaches 175°F.
Are chicken thighs good for diabetics?
Yes, they are a great choice. They provide high-quality protein and healthy fats without adding carbohydrates, which helps maintain stable blood sugar levels.
How to serve baked chicken thighs?
Pair them with a fresh side salad or warm bread. These thighs taste great alongside some no knead rolls to soak up the pan juices.
Is it true that you must sear chicken thighs in a pan first to get crispy skin?
No, this is a common misconception. Using a wire rack allows hot air to circulate under the meat, crisping the skin perfectly without the need for pan-searing.
Easy Baked Chicken Thighs