Failure-Proof Instant Pot Chicken Thighs
- Time: 5 min active + 25 min cook
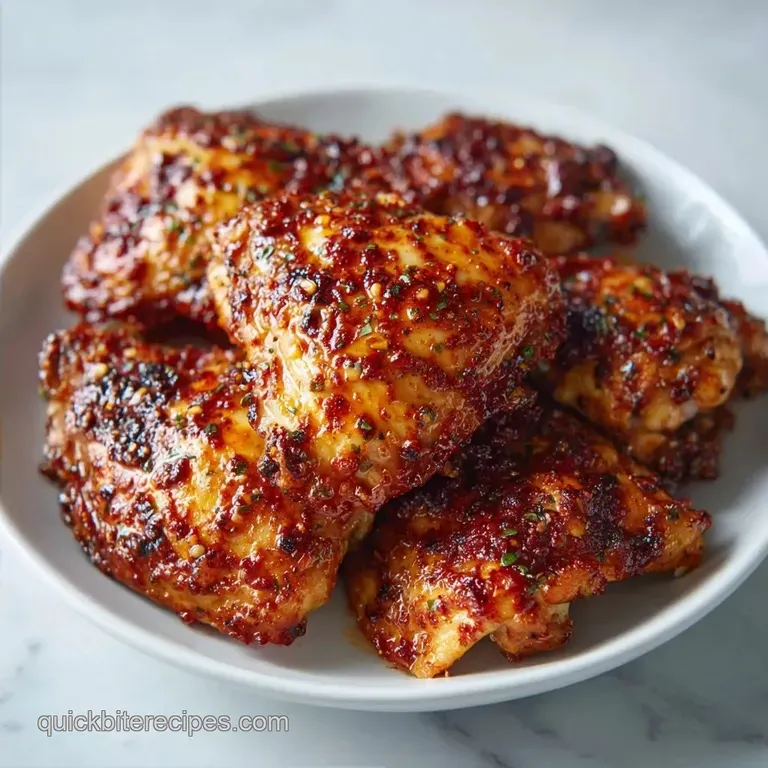
- Flavor/Texture Hook: Velvety glaze with a mahogany crust
- Perfect for: Busy weeknight dinners or meal prep
Instant Pot Chicken Thighs
The sound of chicken hitting a hot pot is the best part of the day. That aggressive sizzle is where the flavor starts. For generations, home cooks in the American South and across Europe have leaned on thighs for their stews and braises. Unlike the lean breast, thighs are forgiving.
They don't dry out when you push them, which is why they are the gold standard for "one pot" tradition.
I used to treat the pressure cooker like a set it and forget it machine, but that's a mistake. If you just toss everything in raw, you get gray meat and a bland sauce. The secret is treating the pot like a skillet first. By searing the meat, you create a crust that tastes like it spent hours in an oven.
This recipe gives you that deep, savory punch in about 30 minutes. We're talking about meat that pulls apart easily but still holds its shape, coated in a glossy lemon garlic sauce. It's the kind of meal that makes your house smell like a professional kitchen without the actual stress.
Why This Method Wins
- Collagen Breakdown: High pressure forces heat into the meat, melting the connective tissue into gelatin. This is what makes the meat feel silky instead of stringy.
- The Fond Factor: Searing creates brown bits on the bottom of the pot. When we add broth, those bits dissolve, creating a savory base that you can't get from boiling.
- Steam Locking: Because the pot is sealed, moisture can't escape. According to Serious Eats, this helps maintain a higher internal temperature while keeping the meat juicy.
- Controlled Release: Using a Natural Pressure Release (NPR) prevents the juices from being sucked out of the meat too quickly, which keeps the texture tender.
| Method | Time | Texture | Best For |
|---|---|---|---|
| Instant Pot | 30 mins | Velvety & Tender | Quick weeknights |
| Oven Roast | 45 mins | Crispy skin/Firm | Sunday dinner |
| Stovetop | 40 mins | Pan seared/Juicy | Small batches |
Ingredient Deep Dive
| Ingredient | Science Role | Pro Secret |
|---|---|---|
| Smoked Paprika | Color & Depth | Use a Spanish Pimentón for a more authentic smokiness |
| Cornstarch | Thickening | Always mix with cold water first to avoid lumps |
| Lemon Juice | Acidity | Add at the very end to keep the brightness from dulling |
| Chicken Broth | Deglazing | Use low sodium so you can control the salt level |
What You'll Need
For the chicken, you'll need 2 lbs of boneless skinless chicken thighs. I prefer thighs over breasts because they stay moist under pressure. You'll also need 1 tbsp olive oil, 1 tsp salt, 1/2 tsp black pepper, 1 tsp smoked paprika, and 1/2 tsp garlic powder.
Why this? Paprika provides that deep red color and smoky aroma.
For the pan sauce, gather 1/2 cup chicken broth, 2 cloves of minced garlic, 1 tbsp fresh lemon juice, 1 tbsp cornstarch, and 1 tbsp cold water. Why this? Fresh lemon is way better than bottled juice for cutting through the fat.
Quick Swaps:
| Original Ingredient | Substitute | Why It Works |
|---|---|---|
| Olive Oil | Avocado Oil | Higher smoke point. Note: Neutral flavor |
| Chicken Broth | Water + Bouillon | Similar salt/flavor profile. Note: Watch the salt |
| Smoked Paprika | Sweet Paprika | Still adds color. Note: Lacks the smoky punch |
| Cornstarch | Arrowroot Powder | Similar thickening. Note: Slightly different gloss |
If you're looking for a different way to prep your meat, you might like my Simple Crockpot Thigh Recipe, which is better for when you have all day to let things simmer.
Step by step Guide
- Set the Instant Pot to Sauté (High) and add olive oil until shimmering. Note: This ensures the meat doesn't stick.
- Season chicken thighs with salt, pepper, smoked paprika, and garlic powder.
- Sear chicken for 3-4 minutes per side until a deep mahogany colored crust forms, then remove to a plate.
- Pour in chicken broth and scrape all brown bits (fond) off the bottom of the pot until the bottom is clean to prevent the Burn notice.
- Return chicken to the pot, seal the lid, and set to Manual/Pressure Cook (High) for 10 minutes.
- Allow a 5 minute Natural Pressure Release (NPR) until the pin drops before venting the remaining steam.
- Remove chicken to a serving platter and set the pot back to Sauté.
- Stir in minced garlic and lemon juice; once simmering, whisk in the cornstarch and water slurry.
- Stir constantly for 1-2 minutes until the sauce is a glossy glaze, then pour over the chicken.
Fix Common Cooking Issues

Troubleshooting Common Issues
| Issue | Solution |
|---|---|
| Why Your Chicken Is Rubbery | If you use a Quick Release instead of a Natural Pressure Release, the sudden drop in pressure can cause the muscle fibers to contract violently. |
| How to Stop the Burn Notice | The "Burn" warning happens when food or thick sauce sticks to the bottom. This is why deglazing with broth in step 4 is non negotiable. |
| Why Your Sauce Is Thin | If the sauce doesn't thicken, you might not have simmered it long enough. The cornstarch needs to hit a specific temperature to activate. |
Checklist for Success:
- ✓ Meat patted dry before seasoning to ensure a better sear.
- ✓ Bottom of the pot completely scraped after searing.
- ✓ Cornstarch slurry mixed cold before adding to the pot.
- ✓ 5 minute NPR followed before opening the lid.
Adjusting the Batch Size
If you're cooking for just one or two people, you can halve the recipe. Use 1 lb of chicken and reduce the broth to 1/4 cup. You don't need to change the pressure cook time, but the sauce will thicken much faster during the final Sauté step.
For a big crowd, you can double the meat to 4 lbs. However, don't double the liquid. Use about 3/4 cup of broth instead of a full cup. The chicken releases its own juices, and too much liquid will make the sauce watery. Work in batches when searing; if you crowd the pot, the meat will steam instead of brown.
Common Kitchen Myths
Myth: Searing seals in the juices. Truth: Searing doesn't actually create a seal. Moisture loss happens throughout the cooking process. Searing is entirely about flavor and color it creates those savory compounds that make the dish taste "rich."
Myth: You must use bone in thighs for more flavor. Truth: While bones add a bit of depth, boneless thighs are just as good in the Instant Pot if you use a quality broth. Plus, they cook faster and are much easier to eat.
Storage and Leftover Tips
Store these Instant Pot Chicken Thighs in an airtight container in the fridge for up to 4 days. To reheat, I recommend using a skillet over medium heat with a splash of water or broth. This keeps the meat from drying out and regenerates the glaze.
You can freeze the cooked chicken in the sauce for up to 3 months. Thaw overnight in the fridge before reheating in the oven at 325°F until warmed through.
For zero waste, don't throw away the leftover pan drippings. If you have a bit of sauce left, whisk in a spoonful of Greek yogurt or sour cream to make a creamy dipping sauce for vegetables.
Best Side Dish Ideas
Since this dish has a bright, zesty glaze, you want sides that can soak up that extra sauce. A bed of fluffy jasmine rice or mashed cauliflower works great. If you want something more comforting, these pair beautifully with my Kopytka with Mushroom Sauce, as the potato dumplings complement the savory chicken.
For a lighter option, try steamed snap peas or roasted carrots. The sweetness of the carrots balances the acidity of the lemon juice in the glaze. Trust me, a simple side of sautéed spinach also works wonders here.
Recipe FAQs
How many minutes to cook chicken thighs in an Instant Pot?
Cook for 25 minutes for boneless thighs or 15 minutes for bone-in. Use the High Pressure setting and follow with a 5-minute natural pressure release.
Are chicken thighs ok for heart patients?
Consult a doctor, but skinless thighs are a leaner choice. Removing the skin significantly lowers the saturated fat content of the meat.
How to prevent chicken thighs from drying out in Instant Pot?
Allow a 5-minute Natural Pressure Release (NPR). A quick release causes muscle fibers to contract violently, which makes the meat rubbery.
Is it true that you can't overcook chicken thighs in an Instant Pot?
No, this is a common misconception. While dark meat is more forgiving than white meat, excessive pressure cooking time will eventually result in a mushy texture.
How to cook chicken thighs in a pressure cooker?
Sear the meat on High Sauté first. Deglaze the pot with chicken broth and pressure cook for 10 to 15 minutes depending on whether the meat is boneless or bone-in.
What can I serve with these chicken thighs?
Pair them with steamed greens or roasted vegetables. If you enjoyed mastering the searing process here, see how the same technique works in crispy baked chicken.
How to avoid the Burn notice?
Deglaze the pot with chicken broth after searing. Scrape all the browned bits off the bottom completely to ensure no food sticks during the pressure cycle.
Instant Pot Chicken Thighs