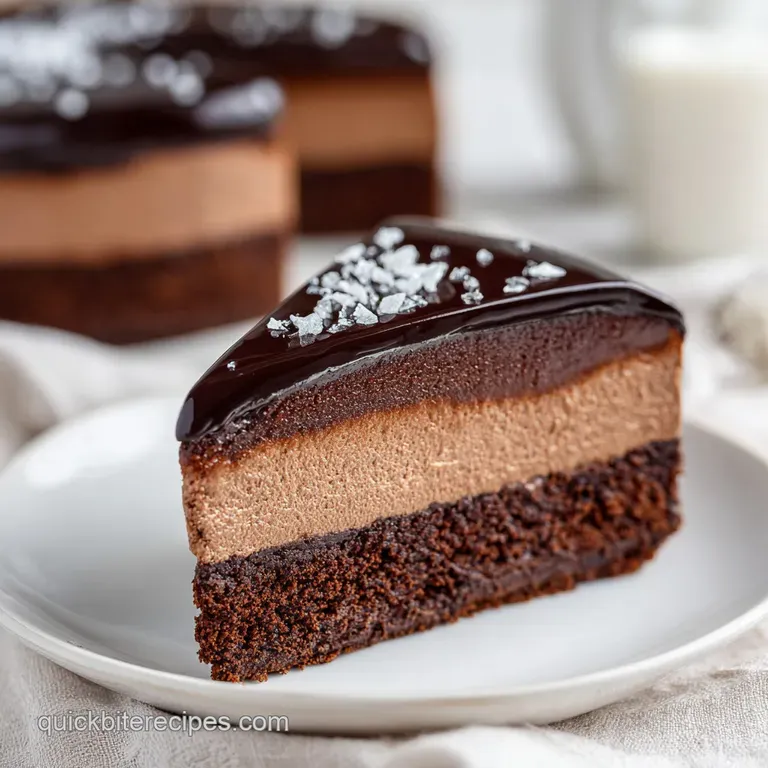
Luxurious Triple Chocolate Mousse Cake: Silky and Rich
- Time:50 mins active + 6 hours chilling = Total 7 hours 8 mins
- Flavor/Texture Hook: Silky, melting layers with a shatter smooth ganache top
- Perfect for: Birthday celebrations or an impressive dinner party finale
- Luxurious Triple Chocolate Mousse Cake
- The Secret To Stable Layers
- Component Analysis
- The Essential Ingredient List
- Tools For The Job
- Step By Step Assembly
- Fixing Common Mousse Problems
- Customizing Your Dessert
- Adjusting the Batch Size
- Chocolate Myths Debunked
- Storage And Waste Tips
- Best Pairings For Cake
- Recipe FAQs
- 📝 Recipe Card
The smell of cocoa powder hitting hot butter is, for me, the ultimate "everything is okay" scent. It fills the kitchen with this heavy, warm aroma that makes the whole house feel cozy.
For a long time, I believed the myth that you absolutely needed expensive gelatin sheets or agar agar to make a mousse cake that didn't slump the moment you cut into it. I'd see these fancy pastry videos and think my home kitchen just wasn't equipped for that level of precision.
But honestly, you don't need those stabilizers. The secret is actually hiding in the chocolate itself. Cocoa butter is a natural fat that hardens as it cools, which means if you use the right chocolate and keep your temperatures in check, the cake holds itself up just fine.
It's a much more natural way to get that velvety texture without the "rubbery" feel that sometimes comes with too much gelatin.
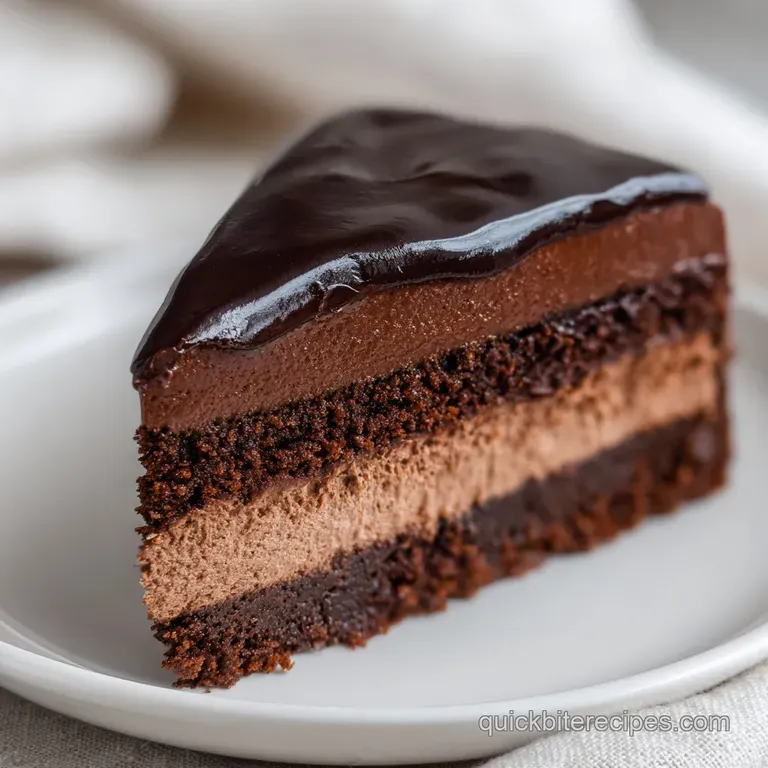
This luxurious triple chocolate mousse cake is all about patience and temperature. We're building a chocolate tower, starting with a moist sponge and layering dark, milk, and white chocolate mousse on top. It's a rich experience, but because we're using air filled mousse rather than a dense fudge, it feels lighter on the palate. Trust me, once you see those three distinct layers on your plate, you'll never go back to a standard layer cake.
Luxurious Triple Chocolate Mousse Cake
To get this right, you have to treat the chocolate with respect. I remember one time I was in a rush and folded my whipped cream into chocolate that was still steaming. The result? A chocolate soup that never set, and I had to eat the whole thing with a spoon straight from the pan. It was tasty, but it wasn't a cake.
The trick is letting the melted chocolate cool down to a lukewarm temperature so it doesn't melt your air bubbles.
When you're working with a luxurious triple chocolate mousse cake, the quality of your chocolate matters, but you don't need to spend a fortune. I've found that a decent store brand cocoa powder and some high-quality chocolate chips or bars work beautifully. According to the USDA FoodData Central, the fat content in cocoa butter is what provides that structural integrity, so just avoid using "sugar-free" or highly processed coatings that don't contain real cocoa butter.
If you're looking for something a bit more fruity to balance out this richness, you might love my Mini Berry Bundt Cakes, which offer a bright contrast to all this chocolate. But for today, we're diving deep into the cocoa.
The Secret To Stable Layers
Since we aren't using gelatin, we have to rely on a few simple kitchen tricks to make sure our layers don't bleed into each other. It's all about how the fats and air interact.
- Cocoa Butter Set
- As the melted chocolate cools, the fats crystallize and create a structural grid that traps the whipped cream.
- Air Pocket Support
- Beating the cream to soft peaks creates millions of tiny bubbles that keep the mousse from feeling like a brick.
- Temperature Gap
- Letting each layer chill for a bit before adding the next ensures the boundary between dark, milk, and white chocolate stays sharp.
- pH Balance
- The buttermilk in the base reacts with the baking soda to create a tender crumb that supports the heavy mousse without compressing.
| Method | Time | Texture | Best For |
|---|---|---|---|
| Traditional Mousse | 7 hours+ | Airy and light | Elegant dinner parties |
| Shortcut Pudding | 2 hours | Dense and creamy | Quick cravings |
| Baked Cheesecake | 6 hours | Thick and rich | Hearty dessert lovers |
Component Analysis
Before we get into the mixing, it's helpful to understand what each part is doing. I used to just follow recipes blindly, but knowing the "why" helps when you're trying to save a batch that's gone wrong.
| Ingredient | Science Role | Pro Secret |
|---|---|---|
| Dutch Process Cocoa | Flavor & Structure | Sift it always to avoid bitter lumps |
| Heavy Whipping Cream | Aeration | Keep it ice cold until the second you whip it |
| Buttermilk | Tenderness | Adds a slight tang that cuts through the sugar |
| Dark Chocolate (60%) | Stability | Higher cocoa % means a firmer set |
The Essential Ingredient List
I've listed everything you'll need here. I'm a big fan of the budget smart approach, so if you don't have vanilla bean paste, regular extract works just fine, though the paste gives you those beautiful little black specks.
For the Cocoa Sponge Base
- 1/2 cup (115g) unsalted butter, softenedWhy this? Provides a tender, melt in-your mouth crumb
- 3/4 cup (150g) granulated sugar
- 2 large eggs
- 1 tsp (5ml) vanilla extract
- 1 cup (125g) all purpose flour
- 1/3 cup (30g) Dutch process cocoa powderWhy this? De acidified for a deeper, smoother color
- 1/2 tsp (3g) baking soda
- 1/4 tsp (1.5g) salt
- 1/2 cup (120ml) buttermilk
For the Mousse Layers
- 6 oz (170g) dark chocolate (60% cocoa), chopped
- 6 oz (170g) milk chocolate, chopped
- 6 oz (170g) white chocolate, chopped
- 3 cups (720ml) heavy whipping cream, dividedWhy this? Must be at least 36% fat for stability
- 3 tbsp (45g) powdered sugar, divided
- 1 tsp (5ml) vanilla bean paste
For the Ganache Finish
- 4 oz (115g) semi sweet chocolate, chopped
- 1/2 cup (120ml) heavy cream
- 1 tbsp (15g) unsalted butter, room temperature
| Original Ingredient | Substitute | Why It Works |
|---|---|---|
| Buttermilk (1/2 cup) | Milk + 1/2 tsp Lemon Juice | Mimics the acidity. Note: Slightly less thick |
| White Chocolate | Blonde Chocolate | Similar fat content. Note: Adds a caramelized flavor |
| Vanilla Bean Paste | Pure Vanilla Extract | Same flavor profile. Note: Lacks the visual seeds |
| Dutch Process Cocoa | Natural Cocoa Powder | Works fine. Note: Use 1/4 tsp extra baking soda |
Right then, let's get into the equipment. You don't need a professional kitchen, but a springform pan is non negotiable here. Trying to flip a mousse cake out of a regular cake pan is a recipe for a heart attack.
Tools For The Job
- 9 inch springform pan (the hero of the recipe)
- Parchment paper (for the bottom)
- Electric hand mixer or stand mixer (such as KitchenAid)
- Three medium heat proof bowls (for the different chocolates)
- Offset spatula (for that smooth top)
- Fine mesh sifter
Step by step Assembly
Let's crack on. This is where the magic happens. Remember to keep your cream cold and your patience high.
1. Baking the Mahogany Colored Base
Preheat your oven to 350°F (175°C). Grease your 9 inch springform pan and line the bottom with parchment paper so the cake doesn't stick. Cream the softened butter and granulated sugar until the mixture looks pale and fluffy. Beat in the eggs one by one, then stir in the vanilla extract.
Sift together the flour, cocoa powder, baking soda, and salt. Now, alternate adding the dry ingredients and the buttermilk into your butter mixture. Stir until just combined - don't overmix or the cake will be tough.
Pour the batter into the pan and bake for 18 minutes until a toothpick comes out clean. Let this cool completely in the pan.
2. Layering the Velvet Chocolate Tiers
For the dark chocolate layer, melt 170g of dark chocolate with 1/4 cup (60ml) of warmed cream. Stir until smooth and let it cool slightly. In a separate bowl, whip 3/4 cup (180ml) of cream and 2 tbsp of powdered sugar until you see soft peaks. Gently fold the whipped cream into the chocolate using a spatula.
Spread this dark mousse over the cooled sponge and pop it in the fridge.
Repeat this for the milk chocolate layer. Melt 170g of milk chocolate with 1/4 cup of warmed cream. Whip 3/4 cup of cream with the remaining 1 tbsp of powdered sugar, then fold it in. Spread it carefully over the dark layer and refrigerate.
Finally, the white chocolate layer. Melt 170g of white chocolate with 1/4 cup of warmed cream and stir in the vanilla bean paste. Fold in 3/4 cup of whipped cream. Spread this on top and let the whole luxurious triple chocolate mousse cake chill for at least 6 hours to set properly.
3. The Final Mirror Glaze Application
Melt 115g of semi sweet chocolate with 120ml of heavy cream and 15g of butter. Stir until it's glossy and smooth. Pour this ganache over the chilled cake and use an offset spatula to smooth it out to the edges. Let it set for about 30 minutes before releasing the springform ring.
Chef's Note: If your ganache is too thick to pour, pop it in the microwave for 5-10 seconds. You want it to flow like heavy syrup, not like paste.
Fixing Common Mousse Problems
Even the best of us have moments where the cake doesn't cooperate. Most mousse issues come down to temperature.
The "Soup" Effect
If your mousse won't set, it's usually because the chocolate was too hot when you folded in the cream, or the cream wasn't whipped enough. You've essentially melted the air bubbles.
Grainy Chocolate Texture
This happens when the chocolate "seizes" or when you overheat it. If you see little clumps, it's often because a drop of water got into the melting chocolate.
Air Bubbles in the Glaze
Tapping the pan on the counter a few times before the glaze sets will help pop those tiny bubbles.
| Problem | Root Cause | Solution |
|---|---|---|
| Mousse too runny | Chocolate was too hot | Chill for 2 extra hours |
| Layers mixing | Didn't chill between layers | Freeze for 15 mins between |
| Glaze cracking | Cake was too cold/frozen | Let cake sit 10 mins before glazing |
Common Mistakes Checklist
- ✓ Did you sift the cocoa powder? (Lumps are the enemy!)
- ✓ Is the cream ice cold before whipping? (Warm cream won't hold air)
- ✓ Did the sponge cool completely? (Warm cake melts the mousse)
- ✓ Did you fold gently? (Beating the mousse kills the volume)
- ✓ Did you wait the full 6 hours? (Patience is the main ingredient)
Customizing Your Dessert
Once you've mastered the luxurious triple chocolate mousse cake, you can start playing with the flavors. I love experimenting with the "cores" of the layers.
The Mocha Twist
Replace the vanilla in the white chocolate layer with a teaspoon of instant espresso powder dissolved in the cream. It creates a beautiful latte flavored tier that cuts through the sweetness.
Salted Caramel Core
Before adding the milk chocolate layer, drizzle a thin layer of salted caramel over the dark chocolate. It adds a hidden surprise that makes the cake feel like it came from a high end patisserie.
Vegan Adaptation
You can use a vegan butter substitute and coconut cream (the thick part from the top of the can) instead of heavy cream. Just be aware that coconut cream is less stable, so you might actually need a bit of agar agar for this version to stay upright.
Luxurious Triple Chocolate Mousse Cake Without Gelatin
This is the version we've made! By relying on the fat in the chocolate and the structure of the whipped cream, you get a cleaner chocolate taste. If you love a different kind of chocolate treat, you should try my Peanut Butter Brownie Swirl Cookies, which use a similar rich chocolate base.
| Variation | Addition | Impact |
|---|---|---|
| Raspberry | Fresh puree | Adds tartness to the white layer |
| Orange | Zest | Brightens the dark chocolate |
| Hazelnut | Nut butter | Adds a "Ferrero" vibe to the milk layer |
Adjusting the Batch Size
Scaling a mousse cake is a bit trickier than scaling a cookie recipe because the pan size changes the depth of the layers.
Scaling Down (Half Batch) If you're using a 6 inch pan, halve all ingredients. For the eggs, beat one egg in a small bowl and use exactly half of it. Reduce the baking time for the sponge by about 20%, checking it at 12-14 minutes.
Scaling Up (Double Batch) If you're making two cakes, don't just double the salt and baking soda - use about 1.5x the amount to avoid a metallic taste. Work in batches for the mousse; whipping 6 cups of cream at once can be overwhelming for a standard hand mixer and might lead to uneven aeration.
Baking Larger Cakes If you move to a 10 inch or 12 inch pan, lower your oven temp by 25°F (to 325°F) and extend the bake time. This ensures the edges don't burn before the center is set.
Chocolate Myths Debunked
I've heard a lot of "rules" about chocolate that just aren't true. Let's clear some of those up.
Myth: You must use a double boiler to melt chocolate. Truth: A microwave is perfectly fine as long as you go in 20 second bursts and stir in between. The goal is just to avoid scorching the chocolate.
Myth: More sugar makes the mousse fluffier. Truth: Too much sugar actually weighs down the air bubbles in the whipped cream. Keep the sugar to the recommended amount to maintain that airy, velvety feel.
Myth: Dark chocolate is always "healthier". Truth: While it has more antioxidants, in a mousse cake, the fat content is still high. Enjoy it for the flavor, not as a health food!
Storage And Waste Tips
This cake keeps remarkably well because the chocolate acts as a natural preservative for the moisture in the sponge.
Fridge Guidelines Keep the cake in the fridge in an airtight container or under a cake dome. It will stay fresh for 4-5 days. I actually think it tastes better on day two because the flavors have more time to meld together.
Freezing Instructions You can freeze this cake for up to 2 months. Wrap the chilled cake tightly in plastic wrap and then foil. When you're ready to eat it, let it thaw slowly in the fridge overnight. Don't thaw it on the counter, or the mousse might weep.
Zero Waste Tips
- Leftover Cream: If you have a bit of heavy cream left over, whip it with a pinch of cinnamon for your morning coffee.
- Chocolate Scraps: Save any leftover chocolate bits from the chopping process and stir them into your next batch of oatmeal.
- Buttermilk: If you have a tablespoon of buttermilk left, add it to your pancake batter for extra fluffiness.
Best Pairings For Cake
Because this luxurious triple chocolate mousse cake is so rich, you want to serve it with things that provide a "reset" for your taste buds.
Fresh Berries A handful of tart raspberries or sliced strawberries is the classic choice. The acidity of the fruit cuts through the fat of the chocolate, making every bite feel fresh.
Bitter Coffee A strong, black espresso or a pour over coffee is the perfect companion. The bitterness of the coffee complements the sweetness of the white chocolate layer perfectly.
Cold Milk For those who love a classic childhood pairing, a glass of ice cold whole milk is the way to go. It cleanses the palate and allows you to appreciate the different nuances of the three chocolate types.
Recipe FAQs
How long does this last?
4 to 5 days. Keep the cake in an airtight container or under a cake dome in the fridge. It often tastes better on day two as the flavors meld.
Can I freeze this cake?
Yes, for up to 2 months. Wrap the chilled cake tightly in plastic wrap and then foil. Thaw it slowly in the fridge overnight before serving.
Can I make it with just one kind of chocolate?
Yes, but you lose the visual layers. You can use the same chocolate for all three mousse steps. For a simpler chocolate snack, see how we use different binders in these no bake bites.
Why isn’t my cake setting?
It likely needs more refrigeration time. This cake must chill for at least 6 hours to set properly. Ensure you didn't overheat the chocolate, which can break the emulsion.
Can I use powdered gelatin?
No, it is not needed. The cocoa butter in the chocolate provides the necessary structure. Adding gelatin would alter the intended creamy texture.
How should I serve this?
Slice with a hot knife for clean edges. Dip your knife in hot water and wipe it dry between every cut. This prevents the mousse from smudging the distinct layers.
Is it true I should bake the base at 400°F for a better crust?
No, this is a common misconception. Bake the sponge at 350°F (175°C) for 18 minutes. Higher temperatures will scorch the cocoa powder and dry out the base.
Triple Chocolate Mousse Cake

