Royal Purple Velvet Cake with Creamy Vanilla Frosting
- Time: 30 min active + 2 hours cooling = Total 3 hours
- Flavor/Texture Hook: Velvety, tight crumb with silky vanilla peaks
- Perfect for: Birthday centerpieces or dramatic dinner parties
- The Royal Purple Velvet Cake with Creamy Vanilla Frosting
- The Secrets of the Velvety Purple Crumb
- Time and Texture Quick Guide
- Selecting the Best Pantry Staples
- Tools for a Smooth Bake
- The Process for Royal Layers
- Fixes for Cake Crumbling and Color
- Troubleshooting Common Issues
- Swapping Ingredients for Different Needs
- Storage and Waste Reduction Tips
- Pairings for a Grand Dessert
- Recipe FAQs
- 📝 Recipe Card
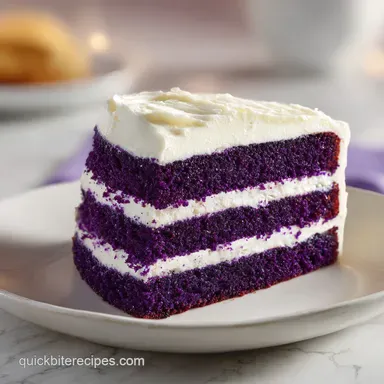
The Royal Purple Velvet Cake with Creamy Vanilla Frosting
That first scent of vanilla bean hitting the butter is what gets me every time. I remember the first time I tried a velvet cake; I used liquid food coloring, and it was a total disaster.
The batter turned into a thin, runny soup, and the color was a muddy, depressing mauve that looked more like a bruised plum than royalty. I almost tossed the whole thing in the bin, but I kept tinkering.
Trust me on this, the secret is all in the gel. Once I switched to a concentrated gel and let my buttermilk hit room temperature, everything changed. This recipe for Royal Purple Velvet Cake with Creamy Vanilla Frosting is a total showstopper.
It has that specific, tight knit texture that doesn't crumble the second your fork touches it, and the color stays vibrant even after it hits the oven.
You can expect a cake that feels weighty but melts on the tongue, contrasted by a frosting that's so silky it almost feels like whipped cream. It's a bit of a project, but we'll take it step by step. Right then, let's crack on.
The Secrets of the Velvety Purple Crumb
I've always been curious about why "velvet" cakes feel different from a standard sponge. It isn't just the color; it's the actual structure of the cake. Here is what's actually happening in your mixing bowl.
Acid Activation: The vinegar and buttermilk react with the baking soda to create tiny, uniform bubbles. This creates that signature tight crumb rather than large, airy holes.
Pigment Stability: Gel coloring is more concentrated and oil based than liquid drops. This prevents the batter from becoming too wet, which keeps the cake from sinking in the middle.
Fat Aeration: Beating softened butter with sugar traps air pockets. These pockets expand in the oven, giving the cake its lift and a velvety mouthfeel.
Moisture Balance: Buttermilk provides a subtle tang that cuts through the sugar. It also keeps the cake moist for days without making it feel greasy.
Time and Texture Quick Guide
Since you're planning this, you need to know how much you're actually making. Whether you're feeding a small group or a crowd, the proportions matter.
| Servings | Ingredient Adjustments | Pan Size | Cook Time |
|---|---|---|---|
| 6 people | ½ recipe | One 8 inch pan | 25-30 mins |
| 12 people | Full recipe | Two 8 inch pans | 28-32 mins |
| 24 people | 2x recipe | Four 8 inch pans | 28-32 mins |
If you're doubling the recipe, don't try to bake it all in one giant pan. You'll end up with a raw center and burnt edges. Work in batches or use multiple racks in your oven, just remember to rotate them halfway through.
Selecting the Best Pantry Staples
I'm quite picky about a few things here. If you use cold buttermilk, your butter will clump, and you'll lose that airy texture. Honestly, don't even bother with low-fat butter; you need the fat for that silky finish.
For the Purple Velvet Cake
- 2.5 cups all purpose flour Why this? Provides the necessary structure for stacking (Substitute: Cake flour for a softer crumb)
- 1.5 cups granulated sugar Why this? Dissolves quickly for a smooth batter (Substitute: Caster sugar)
- 1 tsp baking soda Why this? Reacts with acid to lift the cake (Substitute: None)
- 1 tsp salt Why this? Balances the sweetness (Substitute: Kosher salt)
- 0.75 cup unsalted butter, softened Why this? Essential for aeration (Substitute: Margarine, though flavor drops)
- 2 large eggs Why this? Binds the ingredients together (Substitute: 2 flax eggs for vegan)
- 1 cup buttermilk, room temperature Why this? Tenderizes the gluten (Substitute: 1 cup milk + 1 tbsp lemon juice)
- 1 tsp white distilled vinegar Why this? Boosts the leavening reaction (Substitute: Apple cider vinegar)
- 1 tsp vanilla extract Why this? Adds a warm base note (Substitute: Almond extract for a nutty twist)
- 2 tsp royal purple gel food coloring Why this? Intense color without thinning batter (Substitute: Concentrated paste)
For the Creamy Vanilla Frosting
- 1 cup unsalted butter, softened Why this? Creates the creamy base (Substitute: Vegetable shortening for stability)
- 4 cups powdered sugar, sifted Why this? Ensures no lumps in frosting (Substitute: Icing sugar)
- 3 tbsp heavy cream Why this? Adds a velvety richness (Substitute: Whole milk, but less stable)
- 2 tsp pure vanilla extract Why this? The star flavor profile (Substitute: Vanilla bean paste)
- 0.25 tsp salt Why this? Prevents the frosting from being cloying (Substitute: Fine sea salt)
Tools for a Smooth Bake
You don't need a professional kitchen, but a few specific tools make this way easier. I always use a stand mixer because whipping four cups of powdered sugar by hand is a workout I don't need in my life.
- Hand or Stand Mixer: Essential for getting those stiff frosting peaks.
- Two 8 inch Round Cake Pans: Standard for this recipe to ensure even baking.
- Parchment Paper: Don't skip this. Grease the pan, then line the bottom. It's the only way to ensure the cake doesn't stick.
- Wire Cooling Rack: Prevents the bottom of the cake from getting soggy.
- Sifter: For the powdered sugar. I've made the mistake of skipping this, and the resulting lumps in the frosting are a nightmare to whisk out.
- Offset Spatula: Great for getting that smooth, professional finish on the exterior.
The Process for Royal Layers

Let's break this down into phases. The biggest mistake people make is rushing the cooling process. If the cake is even slightly warm, your frosting will slide right off like a melting glacier.
Phase 1: Preparing the Vibrant Batter
Start by whisking together your flour, sugar, baking soda, and salt in a medium bowl. I like to use a whisk to break up any flour clumps so the leavening is spread evenly.
Now, grab your mixer. Beat the softened butter until it looks pale and fluffy. This takes about 3-5 minutes. Add the eggs one at a time, beating well after each. In a separate small jug, mix your royal purple gel coloring into the room temperature buttermilk and vinegar.
Slowly stream the purple buttermilk into the butter mixture. Keep the mixer on low. You'll see the batter transform into a deep amethyst hue. Stop mixing the second it's smooth. Over mixing develops too much gluten, which makes the cake tough instead of velvety.
Phase 2: The Precise Bake
Grease your two 8 inch pans and line them with parchment. Divide the batter evenly. I usually use a kitchen scale to be exact, but a spatula works too.
Slide them into the oven at 350°F (175°C). Bake for 28-32 minutes. You're looking for the center to spring back slightly when touched, and a toothpick inserted in the middle should come out clean.
- 1. Oven Temp
- 350°F (175°C).
- 2. Bake Time
- 30 minutes (average).
- 3. Cooling
- 10 minutes in pan, 60 minutes on rack.
Let the cakes cool in the pans for exactly 10 minutes. If you flip them too soon, they might crack. Then, move them to a wire rack to cool completely.
Phase 3: Assembling the Royal Layers
Beat your frosting butter until it's creamy. Gradually add the sifted powdered sugar, heavy cream, vanilla, and salt. Once combined, whip it on high for 3 full minutes. You want stiff peaks that hold their shape.
Place your first cake layer on a plate. Spread a thick, generous coat of the vanilla frosting. Top it with the second layer. Now, cover the top and sides. Use your offset spatula to smooth it out. If you want a more rustic look, use the back of a spoon to create swirls.
Fixes for Cake Crumbling and Color
Even the best of us hit a snag. If your cake looks more like a purple pancake than a royal dessert, there's usually a simple reason.
Troubleshooting Common Issues
| Issue | Solution | |||||
|---|---|---|---|---|---|---|
| Why Your Cake Turned Grey or Brown | This usually happens because of the oven temperature or the type of coloring used. If the oven is too hot, the sugars caramelize too quickly, muddying the purple. Also, liquid colors break down under | |||||
| Why Your Frosting is Grainy or Splitting | Graininess comes from unsifted powdered sugar. Splitting usually happens if your butter was too cold or your cream was too hot. If it splits, try warming the bowl slightly with a hairdryer or a warm t | |||||
| Why the Cake Sank in the Middle | This is often caused by opening the oven door too early, which lets out the heat and collapses the air bubbles. Or, you might have used too much baking soda. | Problem | Root Cause | Solution | :--- |
Swapping Ingredients for Different Needs
I know not everyone can eat everything. While this is a rich cake, you can tweak it. However, keep in mind that some swaps change the texture. If you're looking for something a bit lighter for a party spread, you might consider pairing this with a Lemon Cheesecake Delight to give your guests a zesty contrast.
| Original Ingredient | Substitute | Why It Works |
|---|---|---|
| All Purpose Flour | Cake Flour | Lighter protein content. Note: Result is softer, less stable for high stacking |
| Buttermilk | Greek Yogurt + Milk | Similar acidity. Note: Makes the crumb denser and more moist |
| Heavy Cream | Full fat Coconut Milk | Similar fat content. Note: Adds a subtle coconut flavor to the frosting |
| Granulated Sugar | Coconut Sugar | Natural sweetener. Note: Deepens the color, making the purple look darker/brownish |
But what about the color for those avoiding dyes? You can try using a concentrated beet powder, but be warned: you'll never get that "Royal" neon look. It'll be more of a muted berry tone.
Storage and Waste Reduction Tips
A cake this rich actually tastes better the next day once the flavors have melded. Keep it in an airtight cake carrier in the fridge for up to 3 days. If you're serving it, let it sit at room temperature for about an hour so the butter in the cake softens back up.
For the freezer, I recommend freezing the cake layers before frosting them. Wrap each layer tightly in plastic wrap and then foil. They'll stay fresh for 2 months. Thaw them in the fridge overnight before you start the frosting process.
- Frosting Scraps
- If you have leftover frosting in the bowl, don't toss it! Put it in a piping bag and make mini cupcakes or dollops on top of fruit.
- Buttermilk Residue
- Use any leftover buttermilk in your next batch of pancakes or as a soak for fried chicken.
- Cake Trimmings
- If you level your cakes with a knife, take those scraps and press them into a glass with a bit of frosting and melted chocolate to make "cake pops."
Since this cake is such an indulgence, I usually balance my breakfast the next morning with something lighter, like Protein Overnight Oats, to get my nutrition back on track.
Pairings for a Grand Dessert
Because the royal purple cake is so visually striking and rich, you want sides that cut through the sweetness. I don't recommend serving this with another heavy dessert.
A fresh berry medley is the classic choice. Raspberries and blackberries mirror the purple tones and provide a tart contrast to the vanilla frosting. A drizzle of fresh lemon juice over the berries makes it even better.
For drinks, a sharp Earl Grey tea or a strong espresso is the way to go. The bitterness of the coffee or the tannins in the tea cleanse the palate between bites of the velvety cake. If you're serving it at a brunch, a glass of chilled Prosecco complements the richness without overwhelming the vanilla notes.
Honestly, the cake is the star here. Keep the platters simple. A few mint leaves for garnish and a sprinkle of fresh berries around the base of the cake, and you've got a professional looking spread. Trust me, your guests will be too busy staring at the color to care if you didn't make a fancy side dish.
Recipe FAQs
Why did my purple cake turn grey or brown?
The oven was likely too hot. High temperatures caramelize sugars too quickly, which muddies the amethyst color.
How to fix grainy vanilla frosting?
Sift your powdered sugar before mixing. This removes the lumps that cause a sandy or grainy texture.
Can I freeze the cake after frosting it?
No, freeze the cake layers before frosting. Wrap each layer in plastic wrap and foil for up to 2 months, then thaw in the fridge overnight.
How to ensure the cake layers release easily from the pan?
Grease two 8 inch round pans and line the bottoms with parchment paper. This creates a non-stick barrier for a clean release.
Is it true that liquid food coloring works as well as gel for this recipe?
No, this is a common misconception. Liquid colors break down under heat, whereas royal purple gel coloring maintains a vibrant hue.
Why is my creamy frosting splitting?
The butter was likely too cold or the heavy cream was too hot. You can fix this by gently warming the bowl with a hairdryer to re-emulsify the fats.
How to store the cake for maximum flavor?
Keep it in an airtight cake carrier in the fridge for up to 3 days. Let it sit at room temperature for one hour before serving to soften the butter.
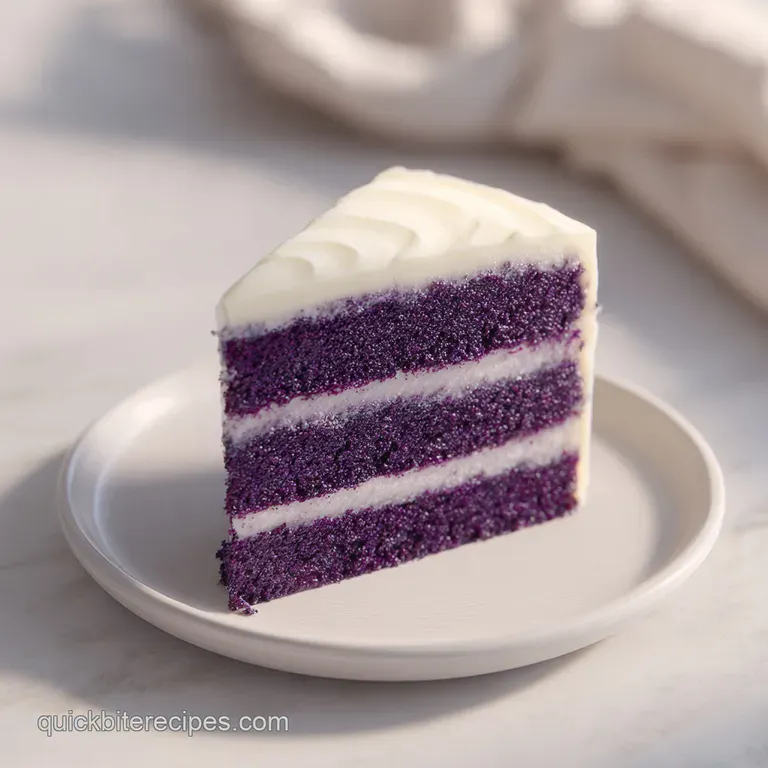
Royal Purple Velvet Cake