Christmas Cookie Lasagna: No-Bake Delight
- Time:30 minutes active + 4 hours chilling = Total 4 hours 30 mins
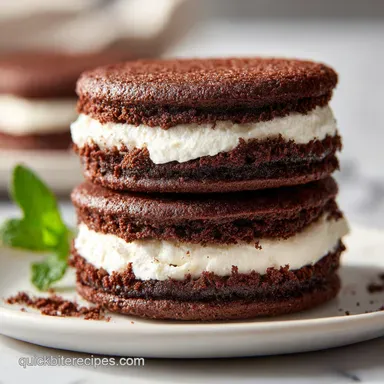
- Flavor/Texture Hook: Velvety cream cheese topped with a silky white chocolate pudding
- Perfect for: Holiday parties, beginner cooks, or anyone who hates turning on the oven
- Festive Christmas Cookie Lasagna No Bake Holiday Delight
- The Secret to Stable Layers
- Detailed Component Analysis
- Ingredients and Simple Swaps
- Essential Kitchen Gear
- Step-by-Step Assembly Guide
- Fixing Common Texture Issues
- Exciting Flavor Tweaks
- Storage and Waste Tips
- The Best Serving Method
- Recipe FAQs
- 📝 Recipe Card
That sound of a cookie shattering in a processor is the best part of my December. For the longest time, my no bake desserts were a complete mess, especially these layered "lasagnas." I once served a version to my family where the filling was so runny it practically slid off the plate the second I cut into it, leaving us with a sugary puddle.
It was a total disaster.
The problem wasn't the ingredients, but the temperature and the way I folded the layers. I realized that without a proper moisture barrier and a chilling window, you're just making fancy pudding. I've stripped this down to the absolute basics so you can get those clean, sharp squares without the stress.
Learn how to make this decadent Festive Christmas Cookie Lasagna No Bake Holiday Delight. It's all about using minimal tools and a few reliable shortcuts that keep the textures distinct. Trust me on this, the freezer step is non negotiable if you want it to actually hold its shape.
Festive Christmas Cookie Lasagna No Bake Holiday Delight
Right then, let's get into it. This dessert is essentially a giant, layered treat that tastes like a cheesecake pudding hybrid. Instead of pasta, we're using crushed cookies, and instead of marinara, we've got a silky white chocolate blend.
It's a crowd pleaser because it hits every note: salty, sweet, tangy, and creamy.
The beauty of this recipe is that it requires zero actual cooking. You aren't worrying about oven hotspots or whether the center is set. You just assemble, chill, and let the fridge do the heavy lifting. It's the kind of dish you can throw together while listening to a holiday playlist and not break a sweat.
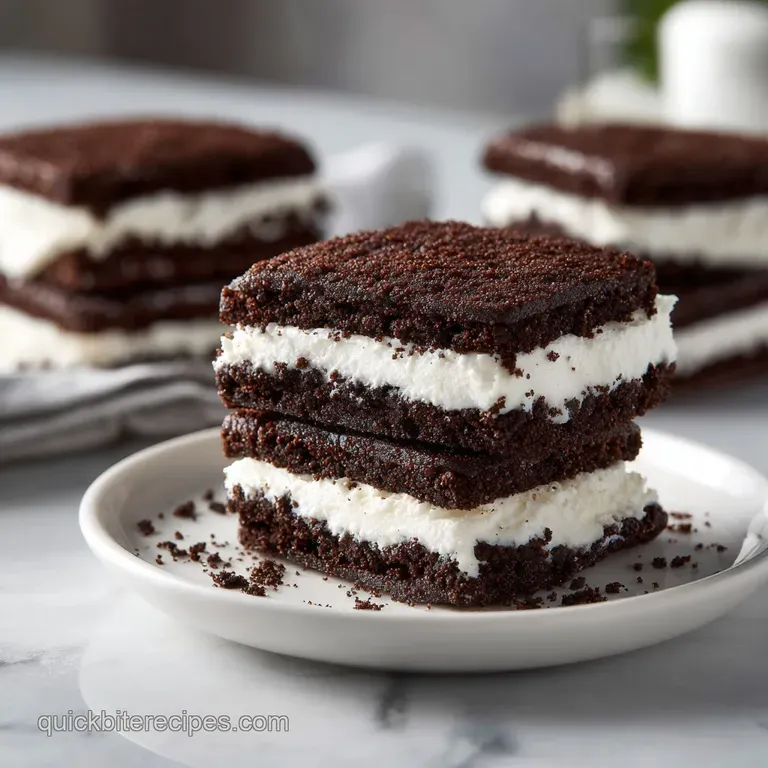
But don't let the "easy" part fool you. There's a bit of a method to the madness here. If you rush the chilling or skip the salt in the crust, it'll taste flat. We want a contrast between the shatter crisp base and the velvety top. Let's crack on with the bits that actually make this work.
The Secret to Stable Layers
I used to think these desserts just "happened," but there's actually a reason why some stay firm and others collapse. Here is what's happening behind the scenes:
- Crust Hardening: Freezing the butter bound crumbs for 10 minutes locks the fats in place, creating a solid foundation that won't soak up the filling.
- Protein Stability: Mixing Greek yogurt with cream cheese adds acidity and structure, which prevents the filling from becoming too runny.
- Starch Gelatinization: The pudding mix uses modified cornstarch that binds the milk into a thick gel, acting as the "glue" for the top layer.
- Air Incorporation: Folding in the whipped topping at the end adds tiny air bubbles, giving the dessert a light, fluffy finish rather than a dense block.
Since we're using a few shortcuts here, it's helpful to see how this compares to a "from scratch" version.
| Feature | Shortcut Version (This Recipe) | From Scratch Version | Impact |
|---|---|---|---|
| Base | Crushed Oreos | Homemade Chocolate Wafer | Faster prep, consistent snap |
| Filling | Pudding Mix | Cornstarch & Cocoa | Guaranteed set every time |
| Topping | Whipped Topping | Stabilized Heavy Cream | Holds shape longer in fridge |
Detailed Component Analysis
I've found that understanding what each ingredient actually does helps when you're trying to tweak things.
| Ingredient | Science Role | Pro Secret |
|---|---|---|
| Cream Cheese | Structural Fat | Soften completely to avoid lumps |
| Greek Yogurt | Acid/Tenderizer | Use full fat for a richer mouthfeel |
| Pudding Mix | Thickener | Whisk vigorously for 2 full mins |
| Melted Butter | Binder | Add a pinch of salt to cut the sugar |
Ingredients and Simple Swaps
Here is everything you'll need. I've kept the list short because we're focusing on minimal tools and maximum flavor.
- 24 Oreo cookies (approx. 340g) Why this? Provides the classic cocoa chocolate snap
- 4 tbsp (57g) melted unsalted butter
- 1 pinch (1g) sea salt
- 8 oz (225g) light cream cheese, softened Why this? Creates the tangy, velvety core
- 1/2 cup (120g) plain non fat Greek yogurt
- 1/4 cup (60ml) maple syrup Why this? Natural sweetness with a hint of depth
- 1 tsp (5ml) pure vanilla extract
- 1 package (96g) sugar-free white chocolate pudding mix
- 2 cups (480ml) cold skim milk Why this? Keeps the pudding light and clean
- 1 cup (240ml) light whipped topping
- 4 Oreo cookies (approx. 20g), crushed
- 1/2 cup (75g) fresh raspberries
If you're missing something, don't panic. Here is how to swap things out without ruining the set.
| Original Ingredient | Substitute | Why It Works |
|---|---|---|
| Oreo Cookies | Chocolate Graham Crackers | Similar flavor profile. Note: Slightly less crunch |
| Maple Syrup | Honey | Similar viscosity. Note: Stronger, distinct floral taste |
| Greek Yogurt | Sour Cream | Similar acidity. Note: Heavier, richer texture |
| Raspberries | Sliced Strawberries | Same tart contrast. Note: Slightly sweeter, less zing |
Honestly, don't even bother with low-fat cream cheese if you can avoid it, but since we're using light versions here, the Greek yogurt does a great job of keeping the texture smooth.
Essential Kitchen Gear
You don't need a professional kitchen for this. I usually just use a couple of basic tools.
- Food processor (or a heavy zip lock bag and a rolling pin)
- 9x13 inch baking dish (glass or ceramic works best)
- Electric hand mixer or a stand mixer such as KitchenAid
- Spatula for smoothing layers
- Whisk
Step-by-step Assembly Guide
Let's put this together. Remember, the goal is distinct layers, not a swirl.
- Crush the Oreo cookies into fine crumbs using a food processor. Mix with melted butter and salt until the texture resembles wet sand.
- Press the mixture firmly into the bottom of a 9x13 inch baking dish using the back of a spoon until perfectly level. Place in the freezer for 10 minutes to set. Note: This prevents the crust from crumbling when you slice it.
- Beat the softened light cream cheese until smooth. Slowly fold in the Greek yogurt, maple syrup, and vanilla extract. Mix on medium speed until the filling is velvety and free of lumps.
- Spread the cream cheese mixture evenly over the chilled crust.
- Whisk the sugar-free pudding mix and cold skim milk together for 2 minutes until thickened. Pour the pudding over the cream cheese layer and smooth the top with a spatula.
- Top with a layer of light whipped topping. Garnish with crushed cookies and raspberries.
- Chill in the refrigerator for at least 4 hours until the edges are firm to the touch.
Chef's Note: To get those professional looking edges, dip your knife in hot water and wipe it dry between every single cut.
Fixing Common Texture Issues
Even with a simple recipe, things can go sideways. Most of the time, it's just a temperature issue.
Why Your Filling Is Runny
If the cream cheese wasn't fully softened or if the pudding wasn't whisked long enough, the layers might bleed into each other. This usually happens when the "bond" isn't strong enough.
Avoiding a Soggy Crust
The biggest culprit here is skipping the freezer step. Without that quick chill, the butter remains too soft, and the moisture from the cream cheese seeps directly into the cookie crumbs.
The Pudding Not Setting
If the milk was too warm, the starch in the pudding mix won't activate properly. Always use milk straight from the fridge for the best result.
| Problem | Root Cause | Solution |
|---|---|---|
| Lumpy Filling | Cold cream cheese | Microwave for 10 seconds in 5 sec bursts |
| Crust Crumbles | Not pressed firmly | Use a flat bottomed glass to pack it down |
| Topping Melts | Not chilled long enough | Give it an extra 2 hours in the fridge |
Common Mistakes Checklist:
- ✓ Did you use cold milk for the pudding?
- ✓ Was the crust frozen for 10 minutes?
- ✓ Is the cream cheese completely smooth before adding yogurt?
- ✓ Did you whisk the pudding for the full 2 minutes?
- ✓ Did you wait the full 4 hours before slicing?
Exciting Flavor Tweaks
Once you've nailed the base recipe, you can start playing with the flavors. Since this is a "lasagna," you can essentially swap the "pasta" or "sauce" for something else.
For a more vibrant look, you could try a version inspired by Thumbprint Cookies for 24 recipe, using red velvet cake crumbs for the base and a hint of cocoa in the cream cheese layer. It makes the whole dish look incredibly festive.
If you want something even more indulgent, check out the textures in a Triple Chocolate Mousse Cake and try replacing the white chocolate pudding with a dark chocolate ganache layer.
- If you want it more tart
- Double the raspberries and add a squeeze of lemon to the cream cheese.
- If you want it crunchier
- Add a layer of toasted almond slivers between the pudding and the whipped topping.
- If you want it minty
- Use mint Oreo cookies and add a drop of peppermint extract to the milk.
Storage and Waste Tips
This dessert keeps surprisingly well, but the raspberries are the first thing to go.
Storage Guidelines: Keep the lasagna in the fridge covered with plastic wrap. It stays fresh for about 3 to 5 days. After day three, the crust may start to soften as it absorbs moisture from the pudding.
Freezing Tips: You can freeze this for up to 2 months. I recommend freezing it in individual squares wrapped in parchment paper. Thaw them in the fridge overnight before serving.
Zero Waste: If you have leftover cookie crumbs or a few broken Oreos, don't toss them. Freeze them in a small bag to use as a topping for yogurt or ice cream later in the week. You can also use any leftover raspberries to make a quick coulis by simmering them with a splash of maple syrup.
The Best Serving Method
To make this Festive Christmas Cookie Lasagna No Bake Holiday Delight look like it came from a bakery, presentation is key. Instead of scooping it out, treat it like a real lasagna.
Use a sharp, thin blade. As mentioned before, the hot water trick is a lifesaver for the pudding layer. Slice it into 24 equal squares. If you're serving it at a party, place the squares on a platter and garnish each one with a single fresh raspberry on top for a pop of color.
For more detailed nutrition information, check out resources from the USDA FoodData Central for insights on common dessert ingredients. If you're worried about how to keep your desserts fresh for guests, feel free to check out more tips on storing desserts here.
This dish is all about balance. The salt in the crust, the tang in the cheese, and the sweetness of the white chocolate create a profile that isn't overly cloying. It's the kind of holiday treat that people actually finish, which is the ultimate win in my book.
Recipe FAQs
How do I get clean slices?
Dip your knife in hot water and wipe it clean between every cut. This prevents the pudding and cream cheese layers from smearing.
Can I make this dessert a day in advance?
Yes, it is highly recommended. Allowing the lasagna to set overnight in the fridge ensures the layers are firm and easier to slice.
Is it true that no-bake desserts never set firmly enough to slice?
No, this is a common misconception. The combination of chilled cream cheese and pudding mix creates a stable structure that holds its shape perfectly.
How to prevent the crust from crumbling?
Press the mixture firmly into the baking dish and freeze it for 10 minutes before adding the filling. This sets the butter and locks the crumbs together.
Can I freeze this holiday treat?
Yes, for up to 2 months. Wrap individual squares in parchment paper and thaw them slowly in the refrigerator overnight.
Why is my cream cheese layer lumpy?
The cream cheese was not softened enough. Always ensure the cheese is completely soft before beating it to achieve a velvety consistency.
Can I substitute the raspberries for other toppings?
Yes, most fresh berries work well. If you enjoy the convenience of no-bake sweets, you might also like these no bake energy bites for a healthier snack.
Festive Christmas Cookie Lasagna