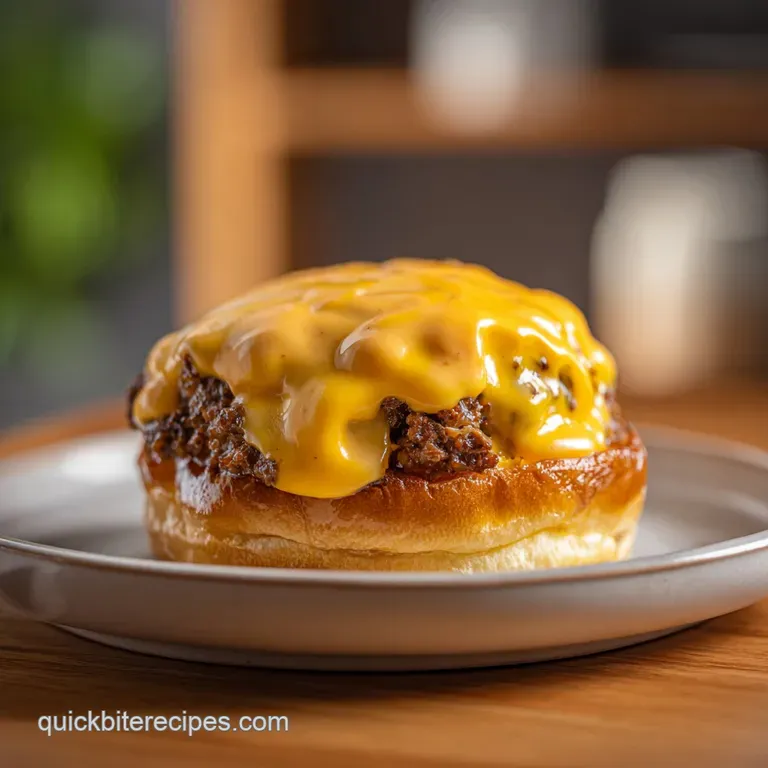
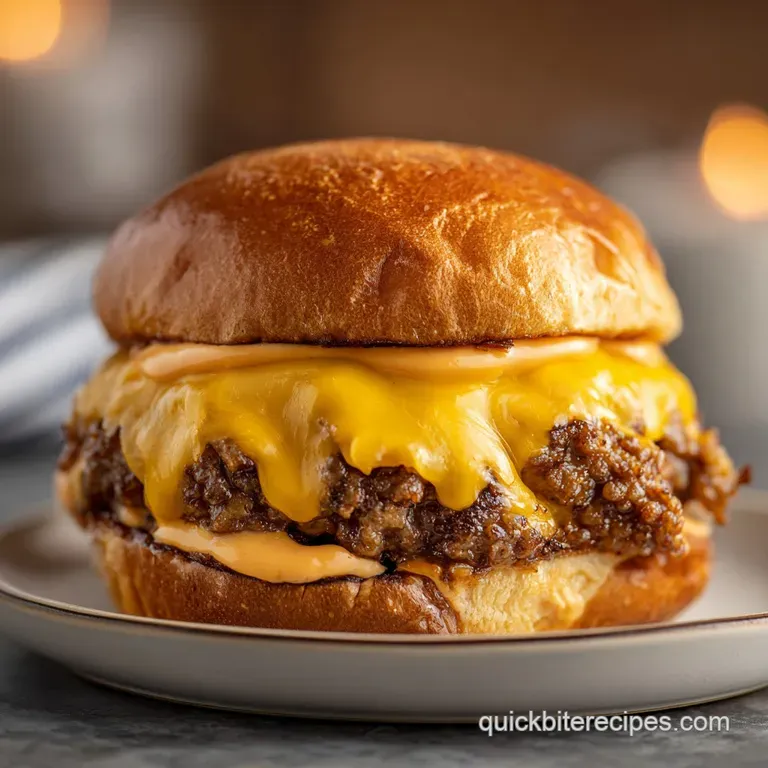
Smash Burger Bowl: High Protein and Savory
- Time:10 minutes prep + 10 minutes cook = Total 20 minutes
- Flavor/Texture Hook: Shatter crisp beef edges with a velvety, tangy sauce
- Perfect for: Fast weeknight dinners or high protein meal prep
- Quick Details for Your Burger Bowl Session
- The Budget-Friendly Component List
- The Essential Gear for Maximum Sizzle
- Step-by-Step Guide to Smashed Beef Perfection
- Avoiding Common Mistakes for a Velvety Finish
- Creative Twists on the Deconstructed Burger
- Smart Storage and Zero Waste Hacks
- Pairing Your Bowl for a Full Meal
- High in Sodium
- Recipe FAQs
- 📝 Recipe Card
The Logic of the Crust
The Contact Point: Pressing the meat flat maximizes the surface area touching the hot pan, which creates a massive amount of browning in a short time.
Fat Rendering: The 20% fat in the beef melts quickly, essentially frying the meat in its own juices to create those lacy, crisp edges.
Moisture Escape: Smashing the beef pushes moisture out of the center and onto the surface, allowing the exterior to sear instead of steaming.
Quick Heat Transfer: Because the patty is so thin, the heat penetrates the center almost instantly, meaning you get a deep crust without overcooking the inside.
| Beef Thickness | Internal Temp | Rest Time | Visual Cue |
|---|---|---|---|
| 1/4 inch (Smashed) | 160°F | 1 min | Mahogany edges, no pink |
| 1/2 inch (Traditional) | 145°F | 3 mins | Light brown, pink center |
| 1 inch (Thick) | 135°F | 5 mins | Seared outside, red center |
Quick Details for Your Burger Bowl Session
When you're putting together a deconstructed burger bowl, the timing is everything. You don't want your beef to sit around and get cold while you're still chopping the onion, and you definitely don't want your lettuce to wilt under the heat of the meat.
I've found that the best flow is to have every single topping prepped and in the bowls before the beef even touches the pan.
This is a fast paced recipe. Once that pan is smoking, you have a very narrow window to get the meat smashed and seared. If you're cooking for a larger group, I highly suggest working in batches.
Overcrowding the pan is the fastest way to drop the temperature, which turns your "smash burger" into a "boiled beef bowl." Keep it simple, keep it fast, and let the cast iron do the heavy lifting.
The Budget Friendly Component List
You don't need prime cuts of meat to make this work. In fact, using the more affordable 80/20 ground beef is actually the smarter move here because the higher fat content is what creates the crust. If you go too lean, you're paying more for meat that won't sear as well.
I also recommend store brand mayonnaise and ketchup, as the addition of Dijon mustard and pickle juice masks the difference in quality.
Component Analysis
| Ingredient | Science Role | Pro Secret |
|---|---|---|
| 80/20 Beef | Fat source for searing | Keep it cold until the second it hits the pan |
| Pickle Juice | Acidity/Tenderizer | Adds a "hidden" tang to the sauce |
| Romaine | Structural base | Chop smaller for better sauce distribution |
| Sharp Cheddar | Emulsified fat | Add immediately after flipping for a melt |
Ingredients and Smart Swaps
For the Beef
- 1 lb ground beef (80/20 lean to fat ratio)Why this? Fat is mandatory for the lacy crust.
- Substitute: Ground bison (same fat ratio). Note: Leaner bison may need a touch of oil in the pan.
- 1 tsp kosher salt (such as Diamond Crystal)Why this? Larger grains prevent over salting.
- Substitute: Sea salt. Note: Use slightly less as it's denser.
- 1/2 tsp black pepperWhy this? Adds a sharp, woody heat.
- Substitute: White pepper. Note: Milder, more subtle flavor.
- 4 slices sharp cheddar cheeseWhy this? High meltability and strong flavor.
- Substitute: Pepper Jack. Note: Adds a spicy kick to the bowl.
For the Signature Sauce
- 1/2 cup mayonnaiseWhy this? The creamy base for emulsion.
- Substitute: Greek yogurt. Note: Tangier and lower fat, but less velvety.
- 2 tbsp ketchupWhy this? Adds sweetness and color.
- Substitute: Tomato paste + pinch of sugar. Note: More concentrated flavor.
- 1 tbsp Dijon mustardWhy this? Adds a sophisticated, pungent bite.
- Substitute: Yellow mustard. Note: More "classic" fast food taste, less depth.
- 1 tsp paprikaWhy this? Adds a smoky, earthy undertone.
- Substitute: Smoked paprika. Note: Much more intense smokiness.
- 1/2 tsp garlic powderWhy this? Even distribution of garlic flavor.
- Substitute: Fresh minced garlic. Note: Can burn if not whisked in well.
- 1 tbsp pickle juiceWhy this? Cuts through the richness of the mayo.
- Substitute: Apple cider vinegar. Note: More acidic, less briny.
For the Bowl Base & Toppings
- 4 cups chopped romaine lettuceWhy this? Maximum crunch factor.
- Substitute: Butter lettuce. Note: Softer texture, less "snap."
- 1 cup cherry tomatoes, halvedWhy this? Pops of sweetness.
- Substitute: Diced Roma tomatoes. Note: Less juicy, more meaty.
- 1 medium red onion, thinly slicedWhy this? Sharp, raw contrast.
- Substitute: Pickled red onions. Note: Sweeter and more acidic.
- 1 large avocado, slicedWhy this? Adds a creamy, buttery mouthfeel.
- Substitute: Sliced cucumber. Note: Lighter, more refreshing, less fat.
- 1/2 cup dill pickle chipsWhy this? Classic burger acidity.
- Substitute: Cornichons. Note: Smaller and crunchier.
The Essential Gear for Maximum Sizzle
You can technically use a stainless steel pan, but a cast iron skillet (like Lodge) is the gold standard for a smash burger bowl. Cast iron holds heat much better than other materials, meaning the pan doesn't cool down the moment the cold meat hits it.
If you use a thin non stick pan, you'll likely find the meat steaming instead of searing because the temperature drops too quickly.
A heavy duty metal spatula is also non negotiable. You need something that can apply a lot of downward pressure without bending. I've seen people try to use plastic or silicone spatulas, and they just don't provide the leverage needed to get that beef truly thin.
If your spatula is too small, you can use a second flat tool or even a burger press to help flatten the meat.
Step-by-step Guide to Smashed Beef Perfection
Right then, let's get cooking. Remember to have your bowls ready and your toppings chopped before you start the beef.
- Whisk the mayonnaise, ketchup, mustard, paprika, garlic powder, and pickle juice in a small bowl. Whisk until the sauce is smooth and velvety, then pop it in the fridge to let the flavors meld.
- Divide the ground beef into 4 equal balls. Note: Do not overwork the meat; just lightly shape them so they don't become dense.
- Heat your cast iron skillet over high heat. Heat until the pan just begins to smoke, which tells you it's ready for the meat.
- Place one beef ball in the pan and immediately press it down with your heavy spatula. Press until thin and flat, then season the top generously with salt and pepper.
- Sear for 2-3 minutes. Do not move the meat until the edges are mahogany colored and crisp. This is where the flavor happens.
- Flip the patty and immediately add a slice of sharp cheddar cheese. Cook for 1 more minute until the cheese is melted and draped over the beef.
- Divide the chopped romaine lettuce evenly between four bowls.
- Top each bowl with a portion of the smashed beef patty, cherry tomatoes, sliced red onion, avocado slices, and dill pickle chips.
- Drizzle the prepared signature sauce over the top of each bowl.
Avoiding Common Mistakes for a Velvety Finish
The most common issue I see with this dish is "steaming." This happens when there's too much moisture in the pan or the heat isn't high enough. When the beef releases its juices and they don't evaporate instantly, the meat boils in the liquid rather than searing.
To prevent this, make sure your pan is screaming hot and you aren't crowding the beef.
Why Your Beef is Steaming
If your beef looks gray and wet instead of brown and crispy, you've likely run into a temperature or spacing issue. This usually happens if the pan isn't preheated long enough or if you're trying to cook too many patties at once.
| Problem | Root Cause | Solution |
|---|---|---|
| Gray, rubbery meat | Pan temperature too low | Heat skillet until it smokes before adding beef |
| Meat sticking to pan | Lack of initial sear | Don't flip the meat too early; wait for the crust to release |
| Bland flavor | Under seasoning | Salt and pepper generously after smashing |
Common Mistakes Checklist
- ✓ Pat the beef balls lightly with a paper towel to remove excess surface moisture.
- ✓ Use a heavy metal spatula to ensure the meat is pressed as thin as possible.
- ✓ Avoid moving the beef during the first 2 minutes of searing to build the crust.
- ✓ Keep the beef balls cold until the moment they hit the pan for better texture.
- ✓ Do not overcrowd the skillet; cook in two batches if your pan is small.
Creative Twists on the Deconstructed Burger
Once you've got the basics down, you can really play around with the base and toppings. If you're feeling like you need more heartiness, a smash burger bowl with potatoes is an absolute winner. Just roast some diced Yukon Gold potatoes with paprika and salt and toss them in with the lettuce.
For a different grain based option, a burger bowl with rice (specifically jasmine or basmati) works great, especially if you add a drizzle of sriracha to the sauce for a "fusion" vibe.
If you're looking for another high protein option for your meal prep, my Mediterranean Quinoa Bowl recipe is a great light lunch that uses similar fresh topping logic. You can even swap the beef in this recipe for ground turkey or chicken, but just remember to add a tablespoon of olive oil to the pan to compensate for the lack of natural beef fat.
Quick Decision Shortcut
- If you want more heat → Add chopped jalapeños or a dash of cayenne to the sauce.
- If you want more crunch → Swap romaine for a mix of shredded kale and red cabbage.
- If you want more bulk → Add a scoop of roasted sweet potato cubes.
Smart Storage and Zero Waste Hacks
If you have leftovers, the best way to handle them is to keep the components separate. Store the cooked beef and cheese in one container and the fresh veggies in another. The sauce should stay in its own jar.
If you mix everything together and put it in the fridge, the lettuce will wilt and the beef will lose its crispness.
Storage Guidelines:
- Cooked Beef: Fridge for 3-4 days or freezer for 2 months.
- Signature Sauce: Fridge for up to 1 week.
- Chopped Veggies: Fridge for 2-3 days (keep avocado separate!).
Zero Waste Tips: Don't toss those red onion scraps or the ends of the romaine. Throw them into a freezer bag with other veggie scraps to make a quick stock. If you have a bit of avocado left over, leave the pit in and squeeze a bit of lemon juice over the top before wrapping it tightly in plastic wrap to prevent browning. For a different dinner vibe later in the week, try a Salmon Sheet Pan Dinner for a one pan cleanup.
Pairing Your Bowl for a Full Meal
Since this bowl is already packed with protein and fats, you want sides that provide a bright, acidic contrast to cut through the richness of the beef and cheese. A simple side of vinegar based coleslaw or a chilled cucumber salad works beautifully.
If you're serving this to a crowd, a big platter of watermelon and feta with mint is a refreshing way to balance the saltiness of the smash burger.
If you're looking for a drink pairing, a crisp sparkling water with a squeeze of lime or a cold ginger ale complements the tang of the signature sauce. Trust me on this: don't overcomplicate the sides.
The bowl is the star of the show, so keep the accompaniments light and fresh to let those mahogany beef edges really shine.
Fresh vs Shortcut Comparison
| Component | Fresh Version | Shortcut Version | Impact |
|---|---|---|---|
| Red Onion | Thinly sliced raw | Dried onion flakes | Fresh provides essential sharp crunch |
| Avocado | Sliced fresh | Pre made guacamole | Fresh is creamier; guac is saltier |
| Sauce | House made | store-bought "Big Mac" sauce | House made is more velvety and customizable |
High in Sodium
845 mg 845 mg of sodium per serving (37% 37% of daily value)
The American Heart Association recommends a daily sodium limit of 2,300mg for most adults to help manage blood pressure and heart health.
Tips to Reduce Sodium
-
Reduce Added Salt-25%
Omit or halve the kosher salt used for the beef; the cheese and condiments already provide significant saltiness.
-
Swap the Pickles-25%
Replace standard dill pickle chips and pickle juice with low-sodium versions or use fresh cucumber slices with apple cider vinegar.
-
Low-Sodium Condiments-20%
Use low-sodium ketchup and replace Dijon mustard with a salt free mustard alternative or a squeeze of fresh lemon juice.
-
Moderate the Cheese-15%
Substitute sharp cheddar with a reduced sodium cheese or use only two slices instead of four.
-
Enhance with Spices
Increase the paprika and garlic powder, or add fresh cracked black pepper and smoked paprika to add depth without adding sodium.
Recipe FAQs
Can I make this dairy-free?
Yes, simply omit the cheddar cheese. The bowl remains flavorful and satisfying thanks to the signature sauce and fresh toppings.
What toppings go well in a burger bowl?
Use romaine lettuce, cherry tomatoes, red onion, avocado, and dill pickle chips. These provide the necessary crunch and acidity to balance the rich, savory beef.
Why isn't my beef getting a crisp crust?
Your skillet likely isn't hot enough. Ensure the cast iron is smoking before adding the meat and do not move the beef for the first 2 3 minutes of searing.
Should I prep the toppings before cooking the beef?
Yes, have everything chopped and the sauce mixed first. The beef cooks very quickly, and prepping ahead ensures the patties stay hot when served.
How to get the best sear on the beef?
Press the beef ball down immediately with a heavy spatula until thin and flat. Season with salt and pepper and sear without moving for 2 3 minutes until the edges are mahogany colored.
Is it true that lean ground beef works best for smash burgers?
No, this is a common misconception. An 80/20 lean-to-fat ratio is required to ensure the patty remains juicy and develops a proper crust.
How to store leftover burger bowls?
Place ingredients in an airtight container for up to 3 days. Store the sauce and avocado separately to maintain freshness and prevent browning.
Savory Smash Burger Bowl

