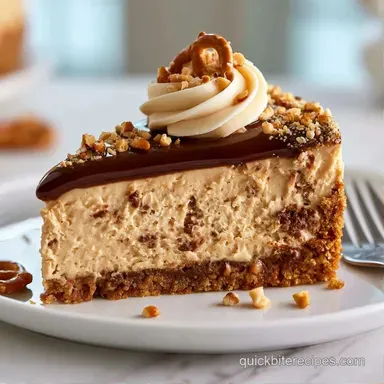
No Bake Fathers Day Dessert with Salty Pretzels
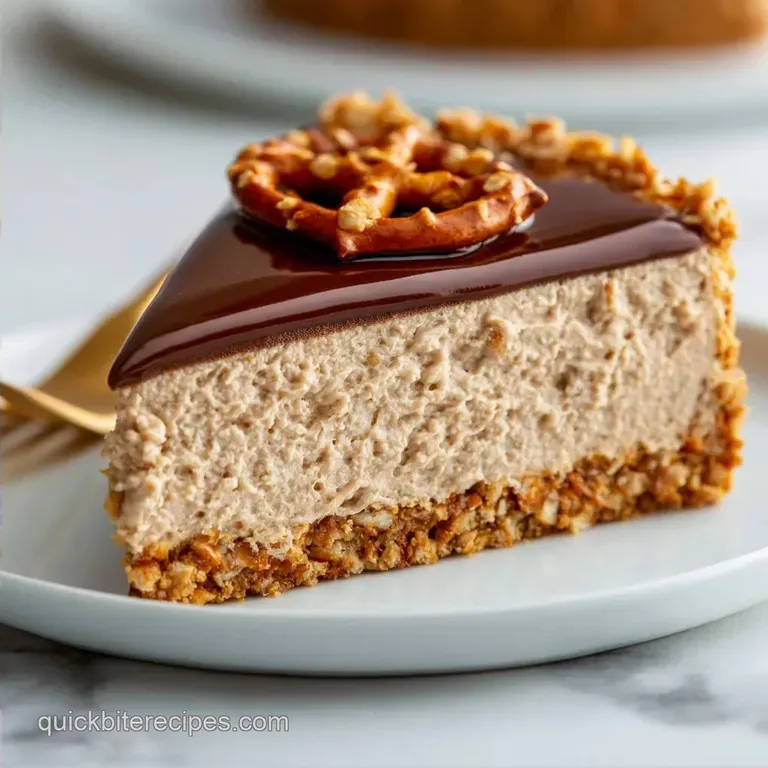
- Time: 30 min active + 4 hrs chilling
- Flavor/Texture Hook: Salty pretzel crunch with a rich chocolate finish
- Perfect for: Dad's who love peanut butter and avoid fuss
Think about those classic American diner treats or the nostalgic snack plates from childhood. There's something about the combination of peanut butter, chocolate, and salt that just feels like home.
In many households, this flavor profile is the gold standard for "dad treats" because it's hearty and doesn't pretend to be something it's not.
I remember seeing similar layered treats at family potlucks years ago. They were always the first thing to disappear because they hit every taste bud at once. It's a crowd pleaser that doesn't require a culinary degree to pull off.
You can expect a thick, salty crust topped with a light peanut butter mousse and a glossy chocolate layer. This No Bake Fathers Day Dessert is designed to be budget friendly, using basic pantry staples to create something that looks like it came from a bakery.
No Bake Fathers Day Dessert
Why the Layers Set
Cold Fats: The cream cheese and butter provide the structure. When chilled, they solidify to hold the air bubbles from the whipped cream.
Sugar Stability: Powdered sugar contains a tiny bit of cornstarch, which helps thicken the mousse and prevents it from weeping.
| Method | Time | Texture | Best For |
|---|---|---|---|
| No Bake | 30 min active | Creamy & Soft | Quick prep, hot weather |
| Classic Baked | 2 hrs active | Dense & Rich | Traditional feel, longer shelf life |
The Ingredient Breakdown
| Ingredient | What It Does | Best Swap |
|---|---|---|
| Pretzels | Adds salt and crunch | Cornflakes (less salt) |
| Cream Cheese | Provides thickness | Mascarpone (richer) |
| Heavy Cream | Adds air and lift | Coconut cream (dairy-free) |
| Chocolate Chips | Creates the hard shell | Cocoa powder + butter |
The Building Blocks
For the crust, we're using crushed pretzels and graham crackers. The pretzels give it a distinct saltiness that cuts through the sugar. Using brown sugar instead of white adds a hint of molasses that makes the base taste more like a professional cookie.
The filling is a mix of cream cheese and peanut butter. To keep the costs down, any store brand creamy peanut butter works here. The key is ensuring the cream cheese is truly soft, otherwise you'll end up with tiny white lumps in your mousse.
For the topping, we're making a simple ganache. If you don't have semi sweet chips, a chopped up chocolate bar works just as well. According to Serious Eats, the ratio of cream to chocolate is what determines if your glaze is pourable or spreadable.
Ingredients List:
- 1.5 cups (150g) crushed pretzelsWhy this? Adds essential salt contrast
- 0.5 cup (55g) graham cracker crumbsWhy this? Binds the crust
- 6 tbsp (85g) unsalted butter, melted
- 2 tbsp (25g) brown sugar
- 8 oz (225g) cream cheese, softened to room temperature
- 1 cup (250g) creamy peanut butterWhy this? The main flavor driver
- 1 cup (120g) powdered sugar
- 1 tsp (5ml) vanilla extract
- 1.5 cups (350ml) heavy whipping cream, coldWhy this? Creates the mousse lift
- 8 oz (225g) semi sweet chocolate chips
- 0.5 cup (120ml) heavy whipping cream
- 1 tbsp (15g) unsalted butter, room temperature
Tools You'll Need
You don't need much for this. A 9 inch springform pan is the most important part so you can pop the sides off without ruining the cake. You'll also need a hand mixer or a stand mixer such as KitchenAid to get the cream fluffy.
A spatula is a must for folding. If you stir too hard, you'll knock the air out of the whipped cream and the dessert will be dense instead of light. Use a microwave safe bowl for the chocolate.
Putting It Together
- Combine the crushed pretzels, graham cracker crumbs, and brown sugar in a bowl. Pour in the melted butter and stir until the mixture resembles wet sand.
- Firmly press the mixture into the bottom of a 9 inch springform pan using the bottom of a measuring cup. Place the pan in the freezer for 10 minutes. Note: This prevents the crust from crumbling when you slice it.
- In a large bowl, beat the softened cream cheese and peanut butter together until completely smooth. Mix in powdered sugar and vanilla extract on low speed until integrated.
- In a separate chilled bowl, whip the cold heavy cream until stiff peaks form. Gently fold the whipped cream into the peanut butter mixture using a spatula. Note: Use a folding motion to keep the air in.
- Spread the peanut butter mousse evenly over the chilled crust.
- Place chocolate chips in a microwave safe bowl. Heat the heavy cream until it just begins to simmer, then pour it over the chocolate and let sit for 5 minutes.
- Stir the chocolate mixture gently from the center outward until smooth and glossy. Stir in room temperature butter if desired, then pour and spread over the mousse layer.
- Refrigerate the cake for 4 hours until the layers are firm to the touch before slicing.
Fixing Common Issues
If your filling feels too soft, it usually means the cream wasn't whipped enough or the cream cheese was too warm. You can't "un mix" it, but you can let it chill for an extra two hours.
Another common problem is the ganache separating, which looks like oily streaks on top. This happens if the cream is too hot or you stir too aggressively.
Troubleshooting Common Issues
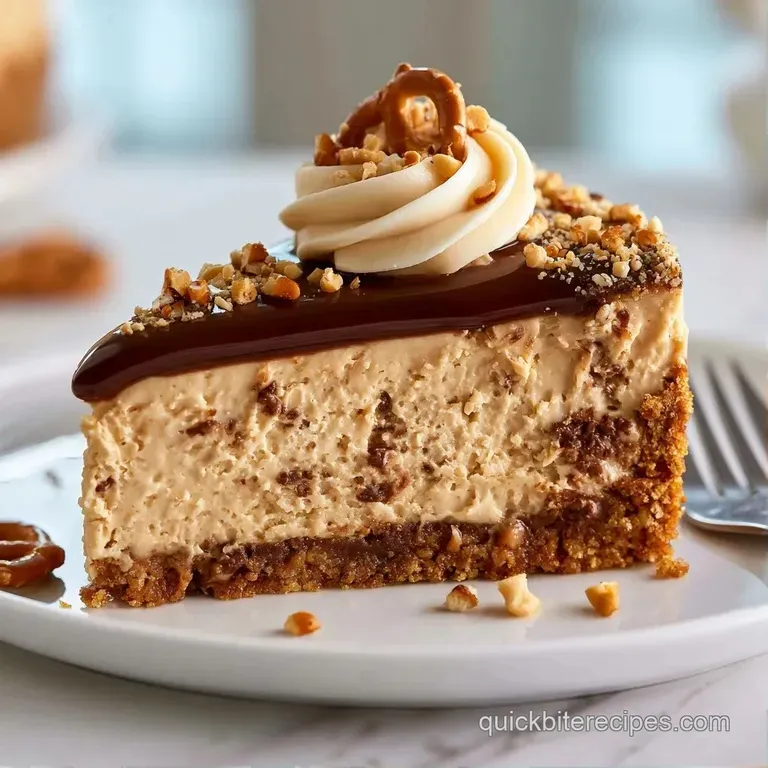
| Issue | Solution |
|---|---|
| Why Your Filling Is Runny | This usually happens if the cream cheese wasn't fully beaten or the heavy cream didn't reach stiff peaks. If it's slightly soft, more fridge time helps. |
| Why Your Ganache Separated | Overheating the cream can break the emulsion. Stir slowly and let it cool slightly before pouring. |
| Why Your Crust Crumbles | The butter might not have been fully integrated or you didn't press it hard enough. |
Changing The Flavors
If you want to swap the peanut butter for almond butter or cashew butter, go for it. The ratios stay the same, though almond butter can be a bit grainier. For a different vibe, you could try my peanut butter bars if you want something more portable.
To add a bit more texture, fold in some toasted pecans or salted peanuts into the mousse. If you're making this for a crowd, you can double the recipe, but use a larger pan or two smaller ones. If you're doubling, you might find a quick ice cream cake technique useful for getting a clean finish on a larger surface.
Reducing The Sugar
You can cut the powdered sugar by half without ruining the texture. The peanut butter already has a fair amount of sweetness, so it still tastes great.
Adding A Crunch
Press a layer of toasted oats into the crust for a "granola" style base.
Scaling Guidelines
Scaling Down (Half Batch): Use a 6 inch pan. Reduce the chilling time by about 20%, but still give it at least 3 hours. When using half an egg (if adding one for binders), beat the egg first and measure by weight.
Scaling Up (Double Batch): Work in batches when whipping the cream to avoid overflowing your bowl. Don't double the salt or vanilla exactly; use about 1.5x instead to keep the flavors balanced. If using a deeper pan, increase the chilling time to 6 hours to ensure the center is set.
Kitchen Myths
"No bake desserts are just pudding." Not true. By using cream cheese and whipped cream, you're creating a stable emulsion. This gives you a structure similar to a cheesecake rather than a soft pudding.
"You need a torch for a professional finish." A torch is for meringue. For this No Bake Fathers Day Dessert, the "professional" look comes from a smooth ganache and a hot knife for clean slices.
Storage And Leftovers
Keep this cake in the fridge in an airtight container. It stays fresh for about 5 days. If you want to freeze it, wrap the whole pan in foil and plastic wrap. It lasts 2 months in the freezer. To thaw, move it to the fridge overnight.
For zero waste, if you have leftover graham cracker crumbs or pretzels, toss them into a smoothie or use them as a coating for fried chicken. If you have a bit of leftover ganache, drizzle it over some fresh strawberries.
Serving Your Cake
To get those clean, bakery style slices, dip a long knife in hot water and wipe it dry between every single cut. This prevents the chocolate from dragging into the peanut butter layer.
For a final touch, sprinkle a pinch of flaky sea salt over the chocolate while it's still slightly tacky. It makes the chocolate pop and fits the "Dad" theme perfectly. If you're serving this as a No Bake Fathers Day Dessert for a party, slice it into small rectangles rather than wedges to get more servings out of the pan.
Recipe FAQs
How to fix a runny peanut butter filling?
Beat the cream cheese more thoroughly and whip the heavy cream to stiff peaks. If the filling remains slightly soft, increase the refrigeration time to help it set.
Can I freeze this dessert for later?
Yes, wrap the pan in foil and plastic wrap. It lasts for 2 months in the freezer and should be moved to the fridge overnight to thaw.
Why did my chocolate ganache separate?
The cream was likely overheated, which breaks the emulsion. Stir the mixture slowly and let it cool slightly before pouring it over the mousse.
Is it true I can skip freezing the crust before adding the filling?
No, this is a common misconception. Freezing the crust for 10 minutes ensures it remains firm and doesn't mix into the peanut butter layer.
How to prevent the pretzel crust from crumbling?
Press the mixture firmly into the pan using the bottom of a measuring cup. Ensure the melted butter is fully integrated with the crumbs and brown sugar before pressing.
How long should I refrigerate the cake before slicing?
Refrigerate for at least 4 hours. This allows the mousse and ganache layers to set completely for clean, professional slices.
Can I make this dessert with a different base?
Yes, you can experiment with different crumb bases. If you enjoyed the balance of textures here, you might like the chewy consistency of our peanut butter cookies.
No Bake Fathers Day Dessert